Placement shapes how the moons curve with your body and where they land when you move.
Phases down the spine or across the ribs sit close to bone, so expect sharper sensation than the forearm or upper arm, where muscle buffers the needle.
Spots like the spine and upper arm heal cleanly and hold detail longer, while fingers and wrists need more care and often a touch-up.
1. Vertical Moon Phases Spine Tattoo
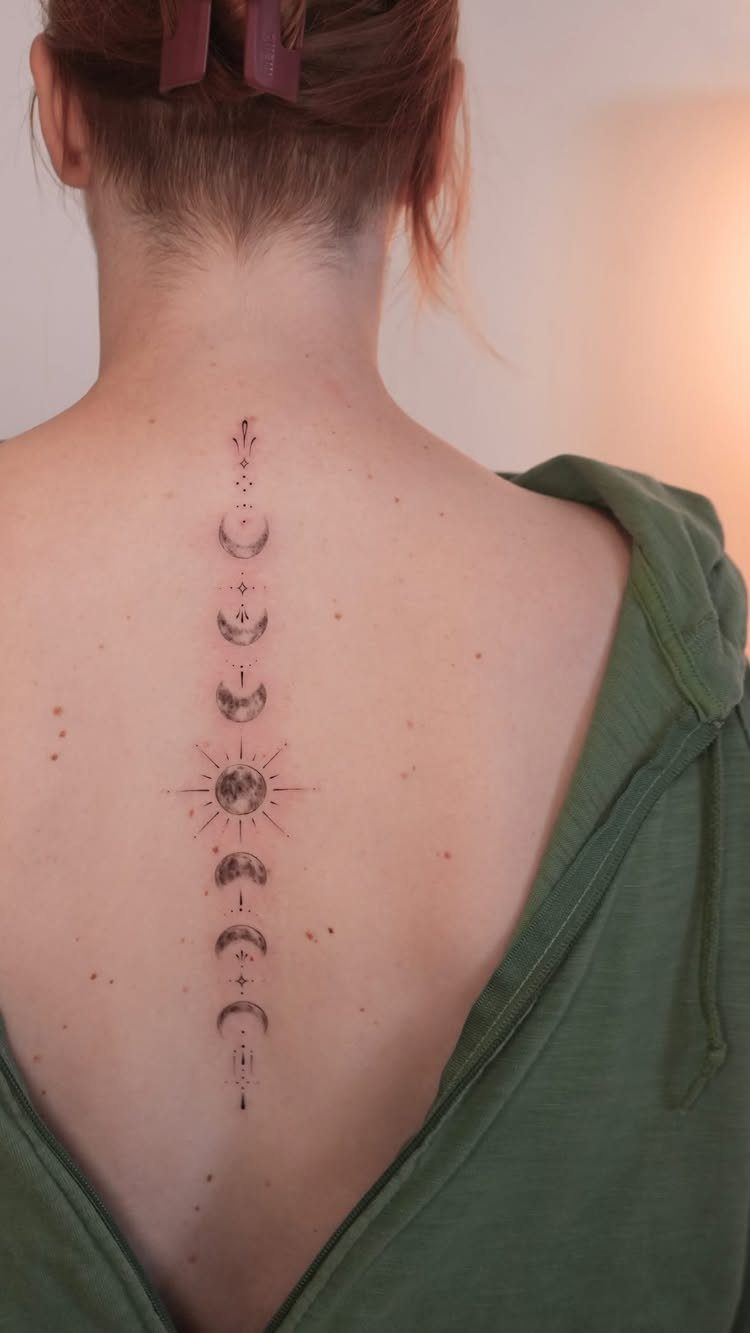
Arranging the phases vertically down the spine lets the design follow the body’s natural line. The sun centered in the middle balances the piece and adds a second celestial layer.
Spine tattoos sit close to bone, so the session feels sharper than fleshier spots. If pain is a concern, starting with a shorter column keeps the first experience manageable.
The narrow width works well here. Too wide and the design starts wrapping toward the sides, which changes how it reads from behind.
2. Moon Phases & Leaves Upper Arm Tattoo
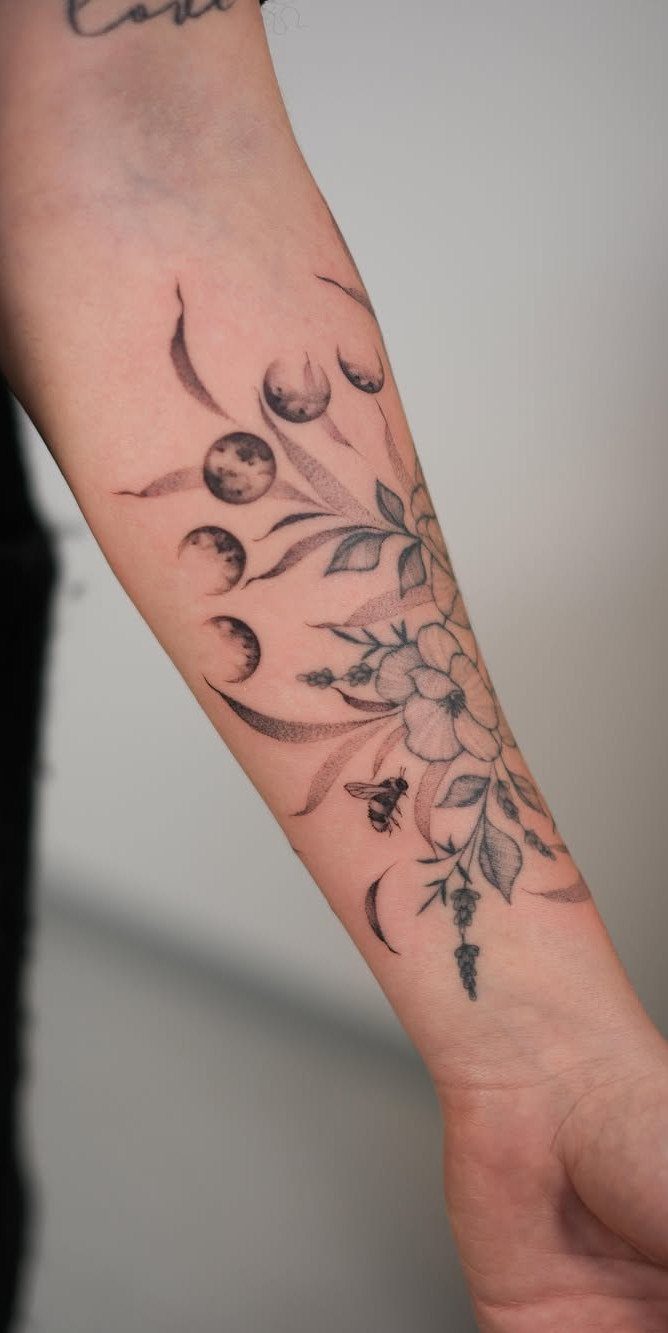
Moon phases gain softness when paired with organic shapes. Leaves, a single bloom and a bee give the design a natural theme without crowding the forearm.
Placement on the outer forearm makes the tattoo visible to you throughout the day. Black and grey ink holds everything together, even with multiple elements.
If you want a similar look, ask your artist to space the phases evenly and let the botanicals fill the gaps. Too much symmetry can flatten the design, so slight variation in leaf size or angle helps.
3. Decorative Moon Phases Arm Tattoo
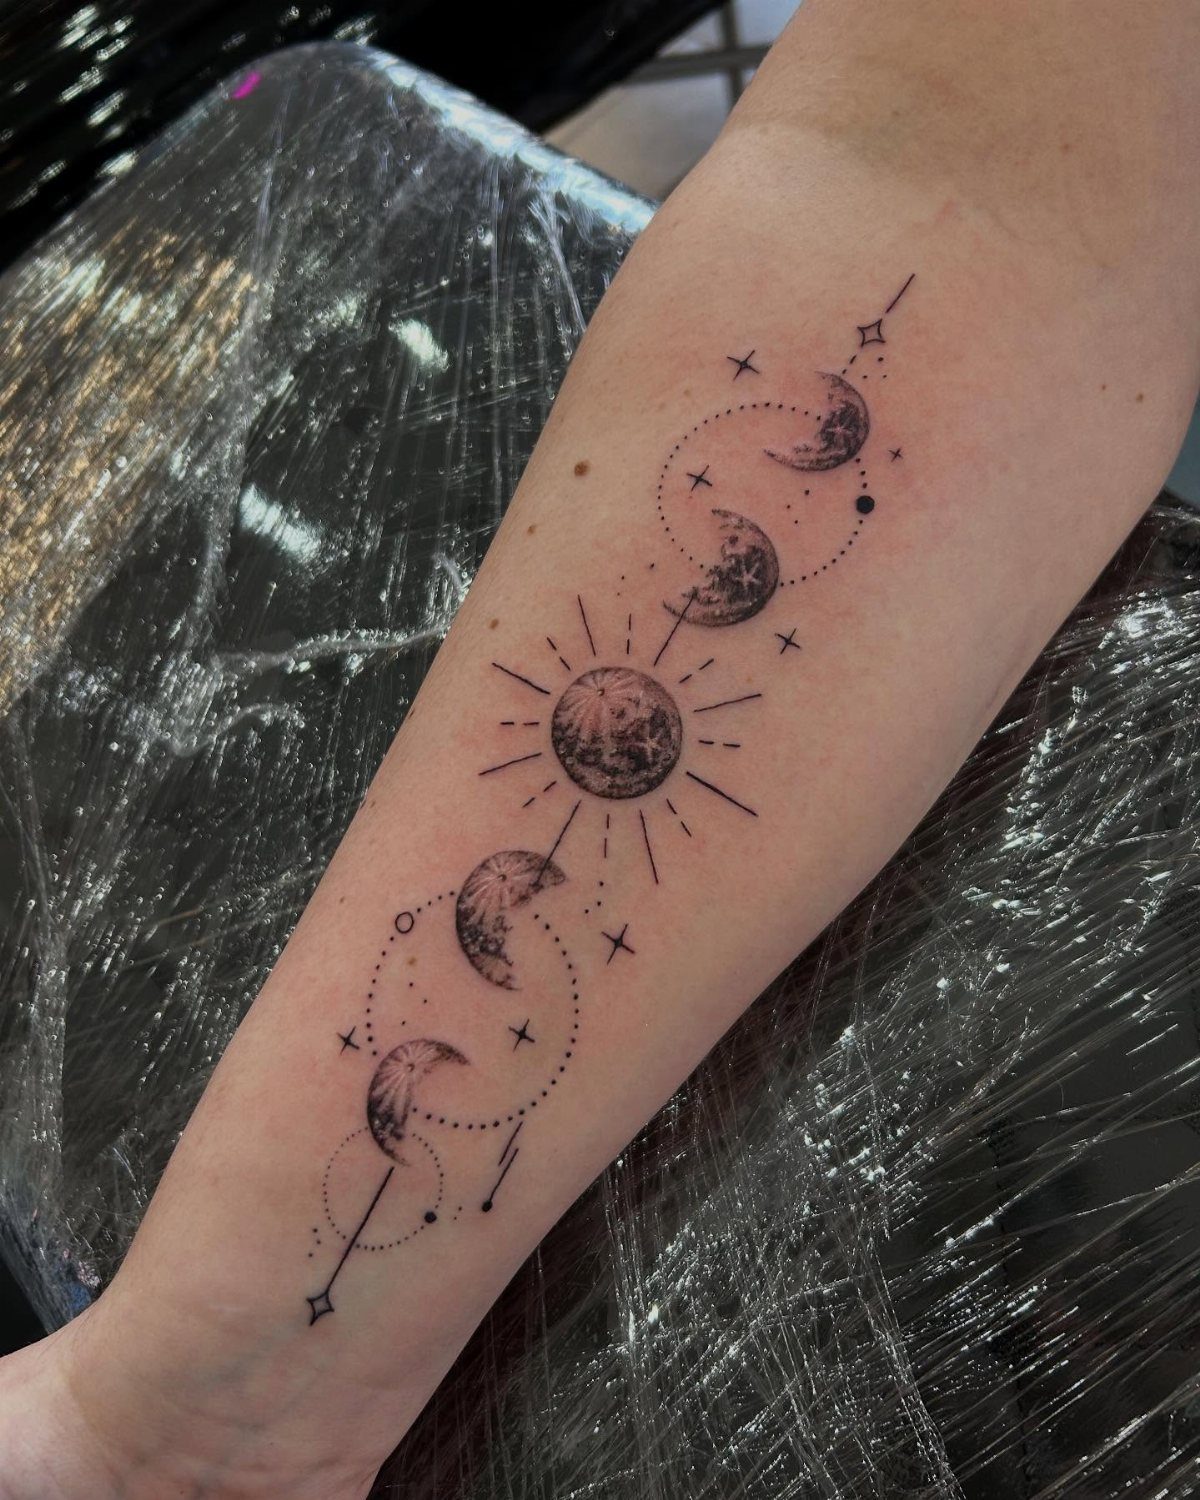
Stars and dots radiating from each phase turn a simple moon sequence into something more layered. The sunburst at the center anchors the design and gives it a focal point.
Forearm placement offers good visibility and a surface that stays relatively flat, which helps detailed linework hold up over time. Black ink with fine detail requires an artist comfortable with precision.
Avoid soaking the tattoo during that window, and moisturize once the skin starts to feel tight.
4. Simple Minimalist Moon Phases Upper Arm Tattoo
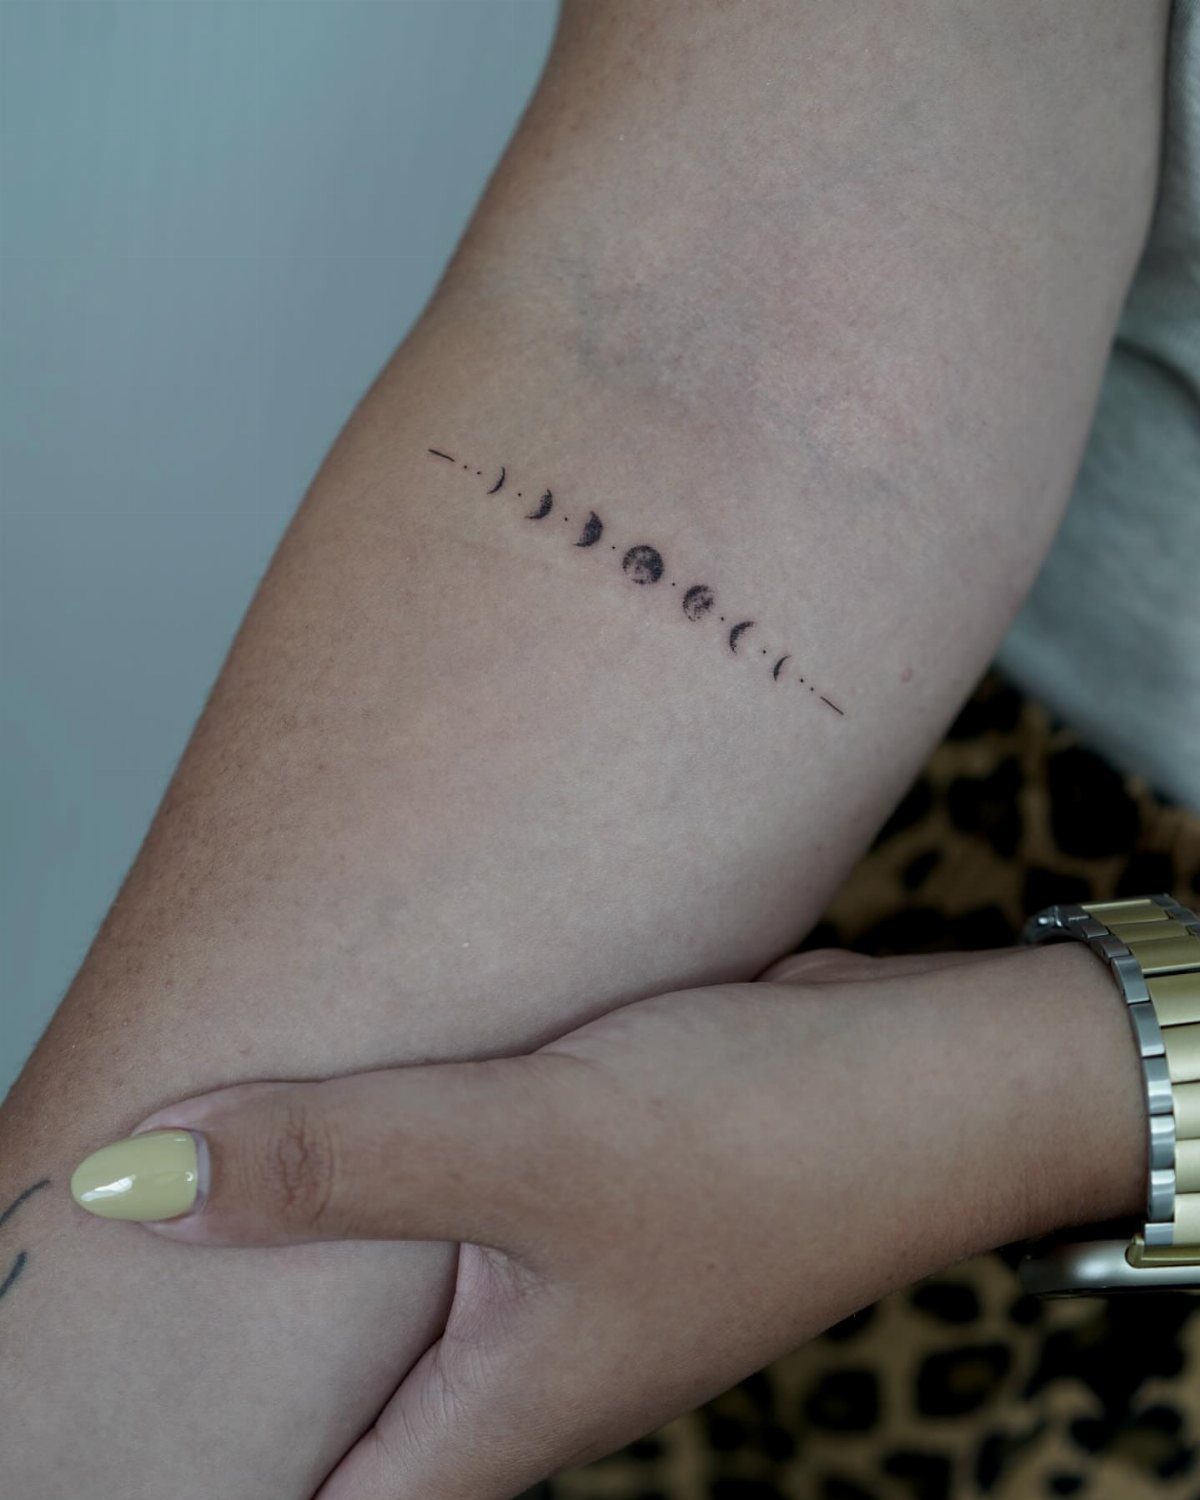
Clean circles and minimal shading keep this design compact. The upper arm sits high enough that long sleeves cover it when needed, but short sleeves show it off.
Small tattoos take less time, usually under an hour, and cost less than larger pieces.
Minimalist work relies on steady linework. Look for an artist whose portfolio shows crisp, even circles, since any wobble stands out more when there is no shading to soften it.
5. Curved Ribcage Moon Phases Tattoo
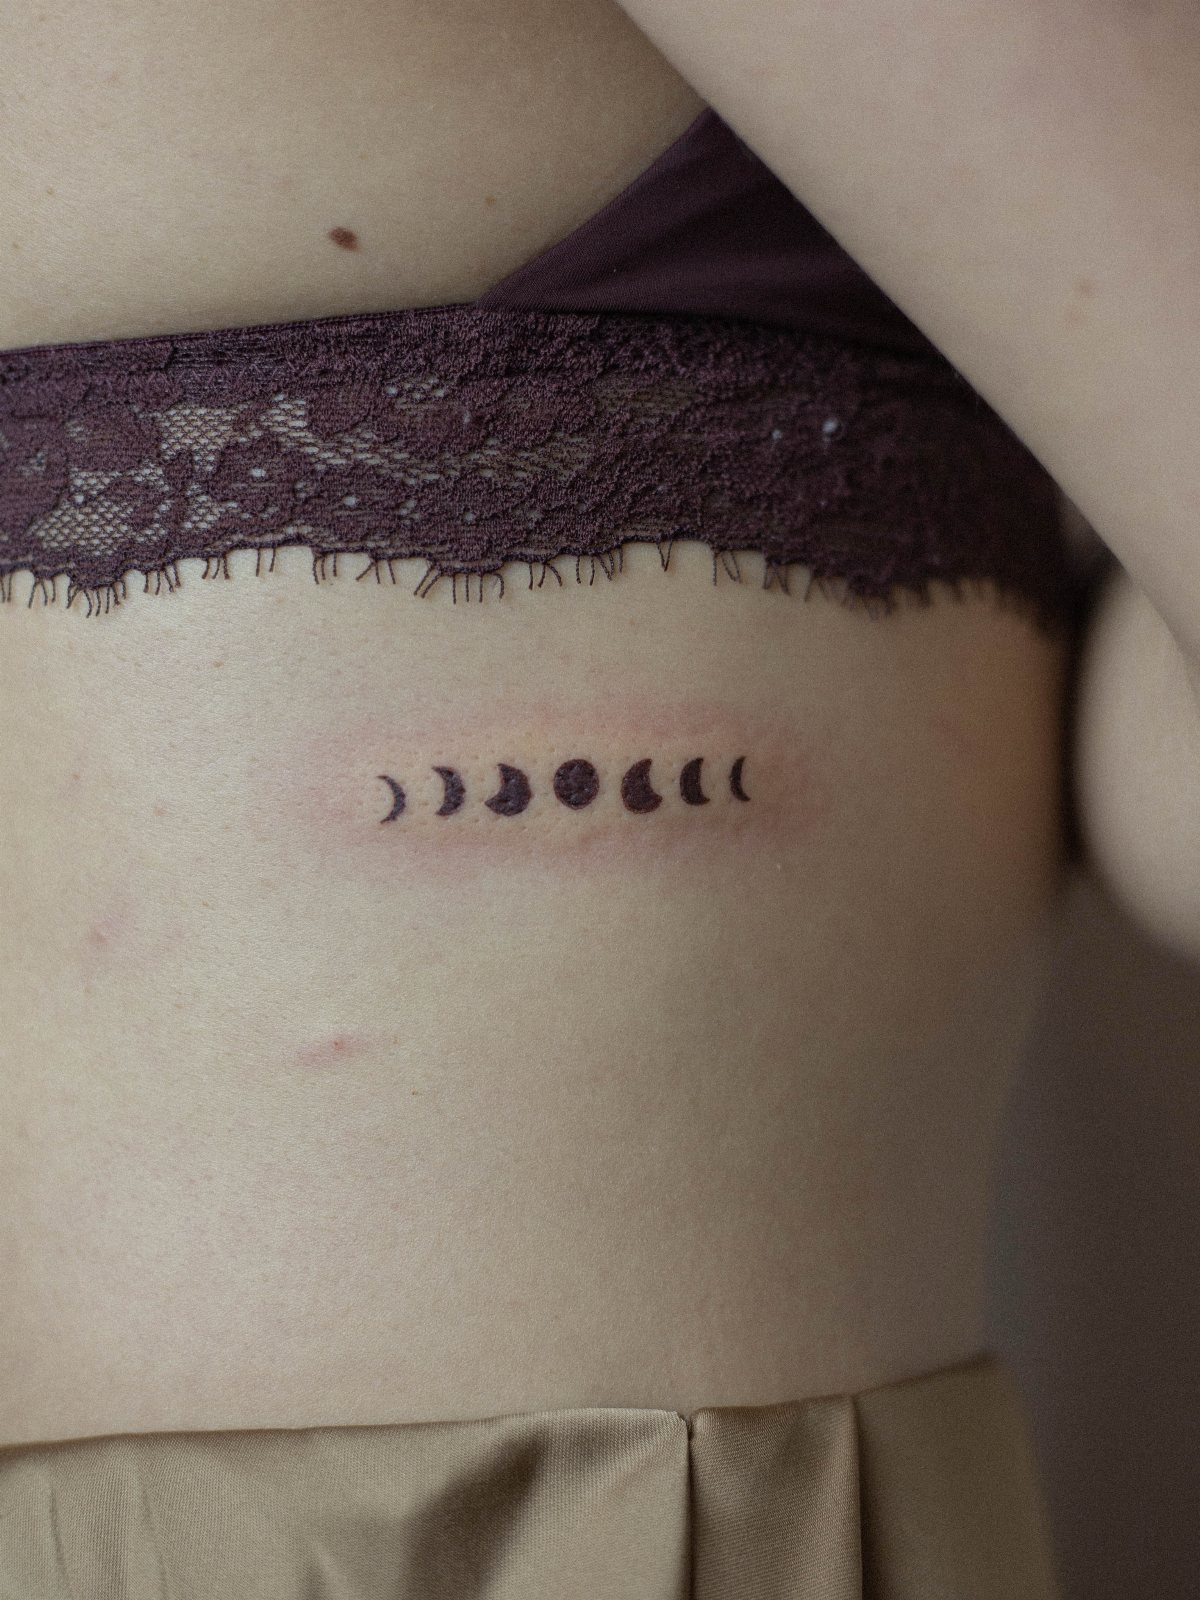
Curving the phases along the ribcage follows the natural contour and adds dimension. The ribcage offers a discreet spot that stays hidden under most clothing.
Ribs are one of the more painful placements.
Thin skin over bone means more sensation, and breathing can make the needle feel more intense. Sessions here often run shorter to stay manageable.
Aftercare is straightforward but requires attention: avoid tight waistbands that rub the area, and let the tattoo breathe while it heals.
6. Hand Poked Delicate Hand Moon Phase Tattoo
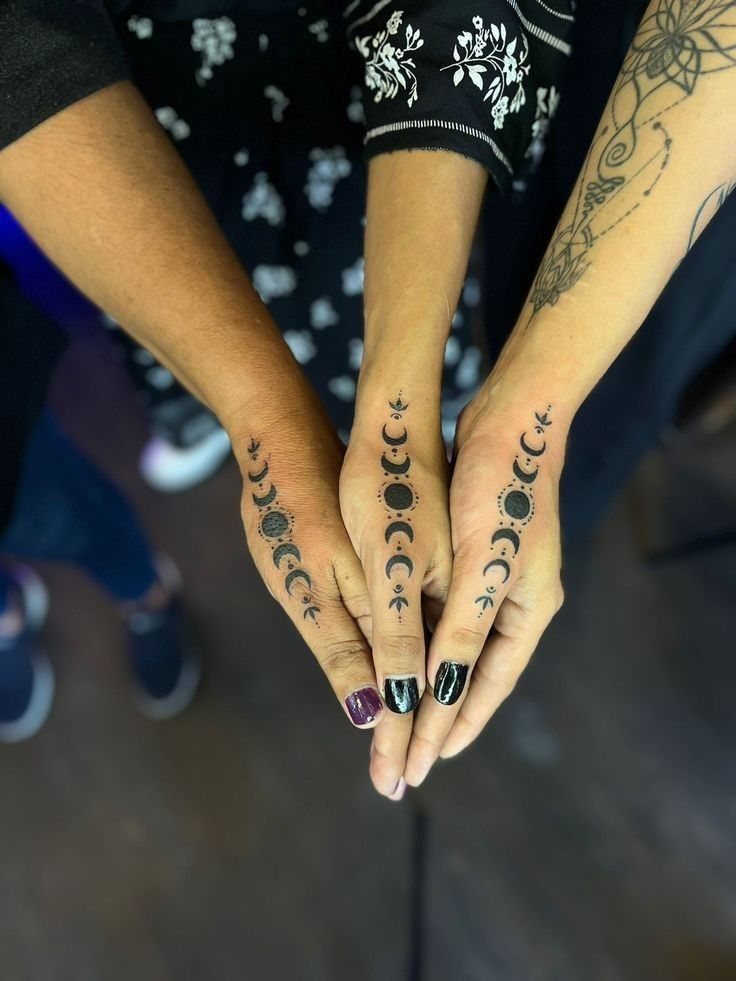
Hand-poked tattoos build the design dot by dot, which gives the ink a softer, slightly textured look compared to machine work. The back of the hand is a bold choice, visible in nearly every context.
Hands fade faster than most placements because the skin renews constantly. Expect touchups to maintain the crispness of the lines.
Pain level on the hand sits higher than fleshy areas, though hand-poking feels different from machine tattooing: slower, more of a tapping sensation. If you want something subtle, the center line of the hand keeps the phases aligned and balanced.
7. Simple Moon Phases Spine Tattoo
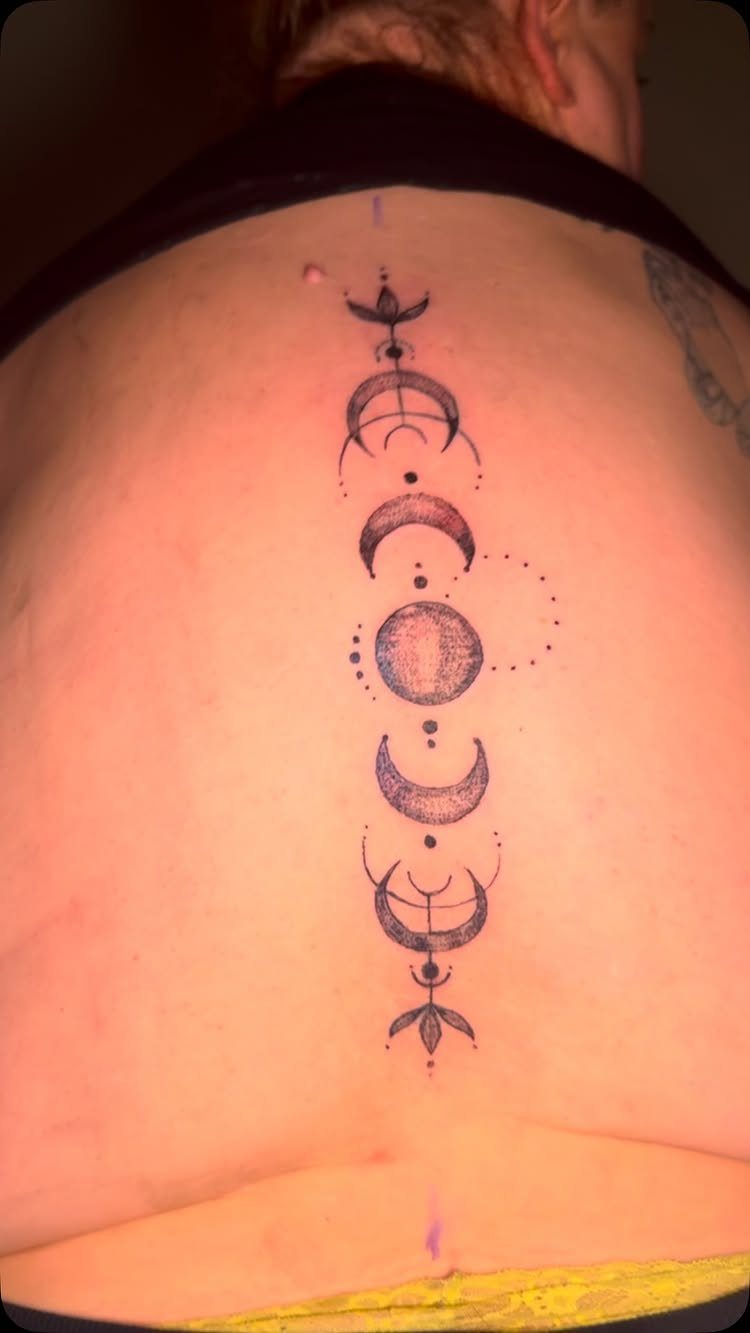
A straight line of phases down the center of the spine makes the placement narrow and symmetrical. Each phase sits stacked, so the full sequence reads cleanly from top to bottom.
Keeping the moons simple, without added stars or flourishes, shortens the session and makes the tattoo easier to touch up later.
The spine’s central position means the design stays covered under most shirts but shows in backless tops or at the beach.
If you sit for long sessions poorly, a shorter spine piece like this one finishes faster than designs that stretch from neck to lower back.
8. Moon Phases Wrap Around Bracelet Tattoo
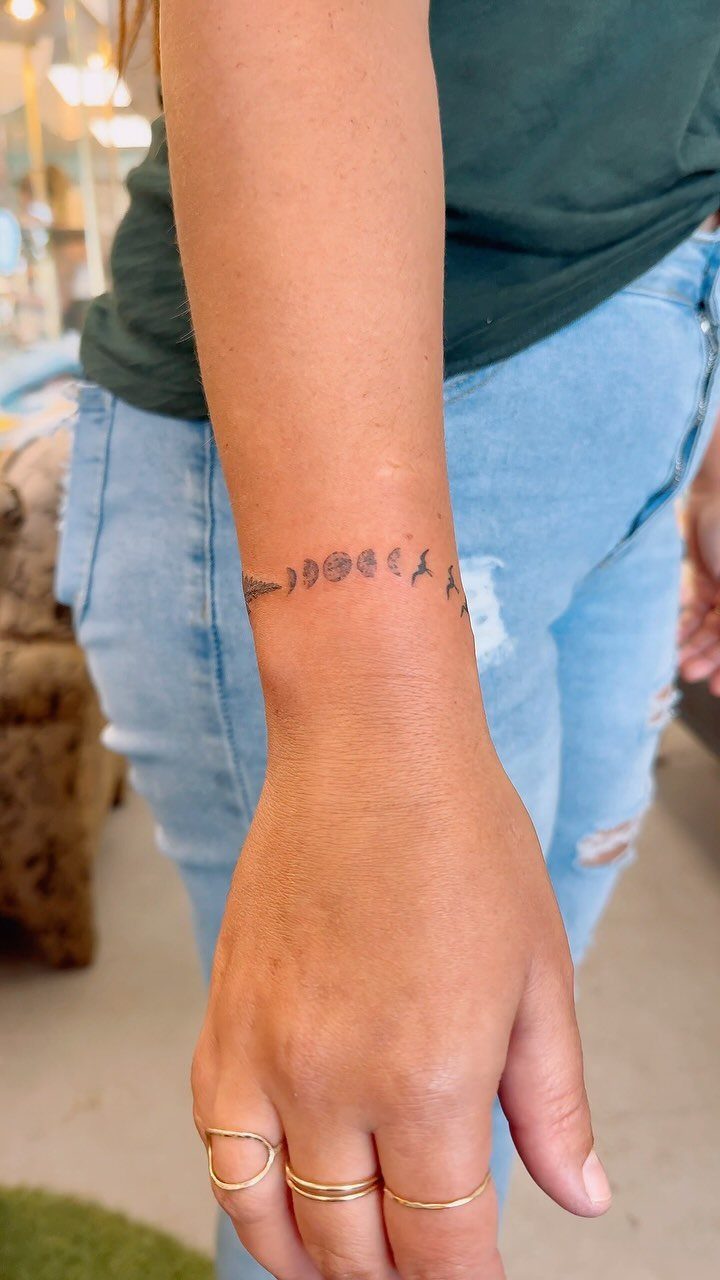
Wrapping the phases around the wrist creates a bracelet effect that sits visible most of the time. The wrist curves, so the design needs to account for that shape or it reads unevenly from certain angles.
Wrist tattoos lose detail sooner than placements with thicker skin, especially on the sides where clothing and watch bands rub. Plan for a touchup within a few years if crisp lines matter to you.
Small additions like birds or ferns personalize the band without adding much time to the session. The wrist sits over bone, so expect more sensation than fleshier areas.
9. Simple Hand Poked Back of Arm Moon Phases Tattoo
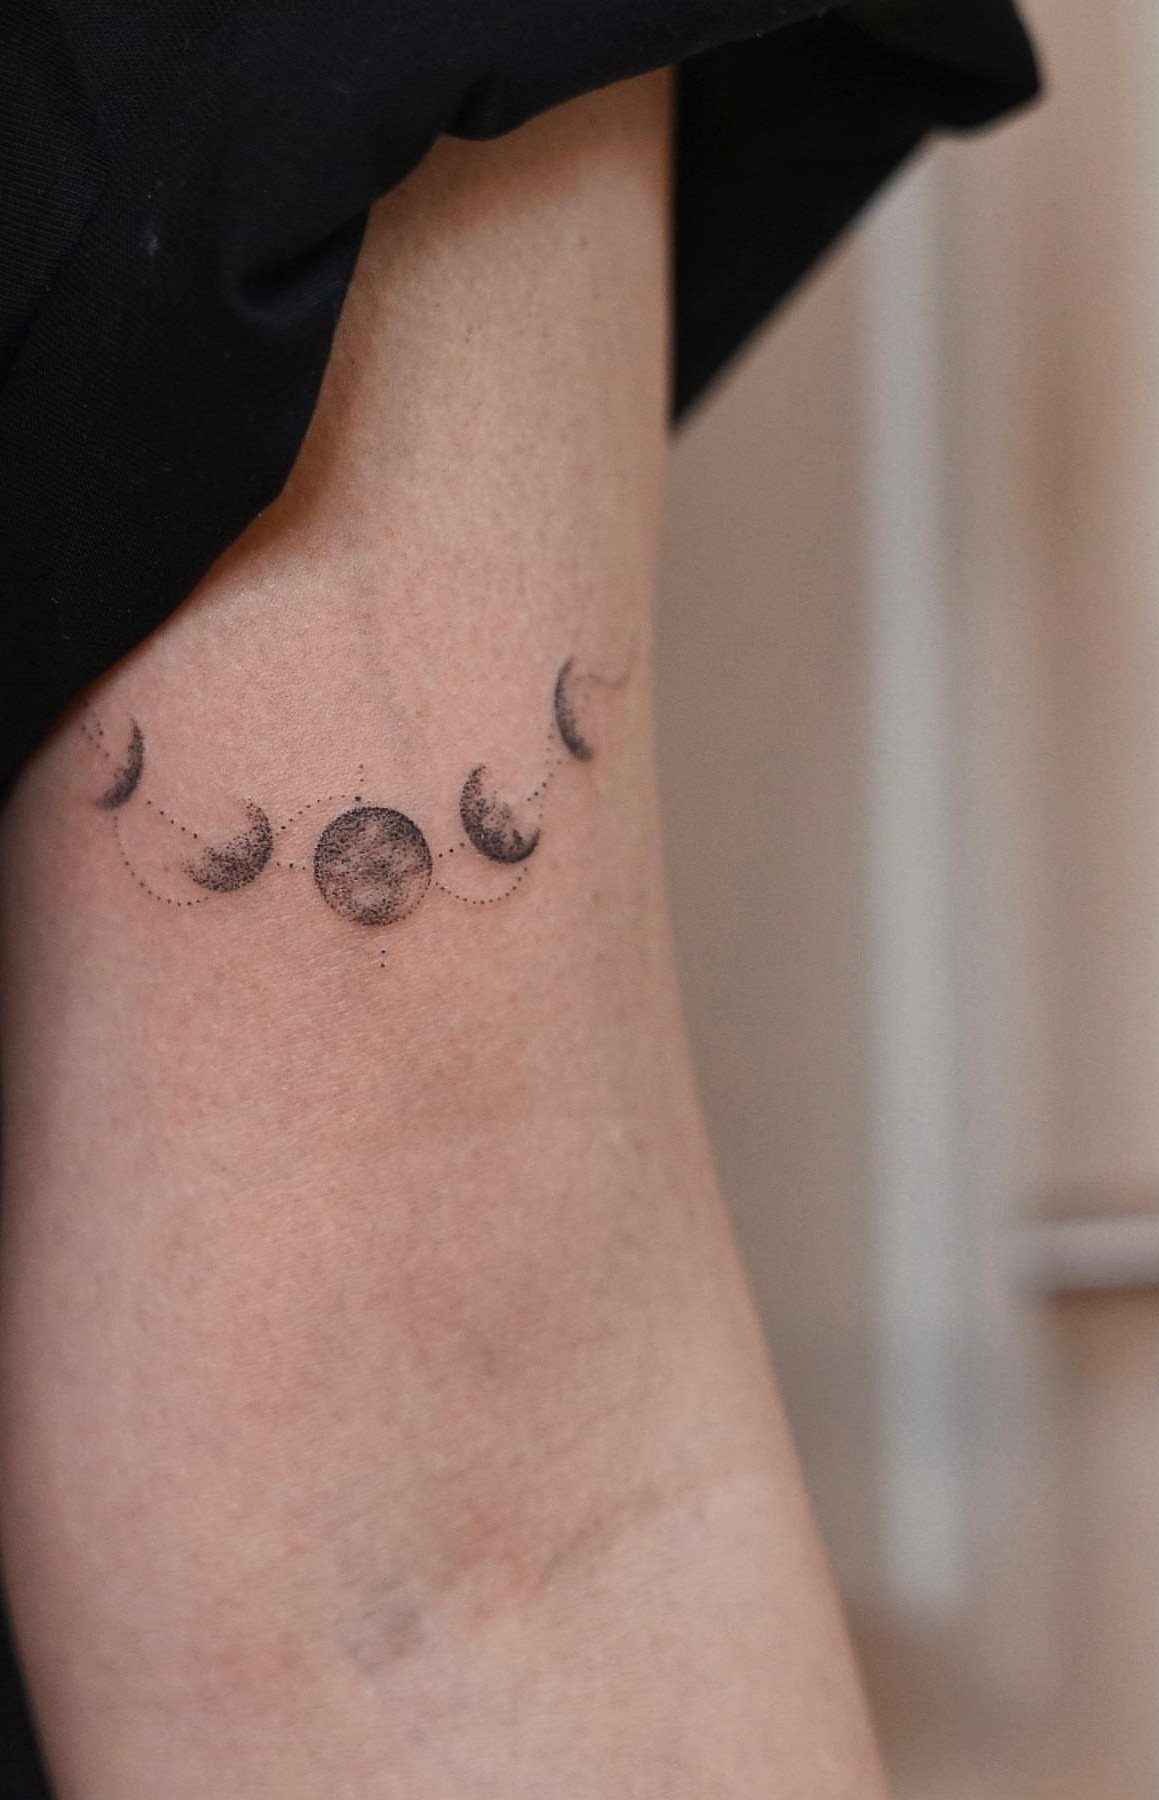
Placing the phases on the back of the arm keeps them visible to others but not to you throughout the day.
The curve of the tricep area follows the natural line of the phases, so the design sits comfortably without needing to wrap around the arm.
Hand-poked work here feels less intense than machine tattooing and heals with a softer edge. The back of the arm has enough flesh to buffer the bone, making it one of the gentler spots for a first tattoo.
Keep the phases small and the design stays quick, usually under an hour.
10. Minimalist Sphere Moon Phases Shoulder Tattoo
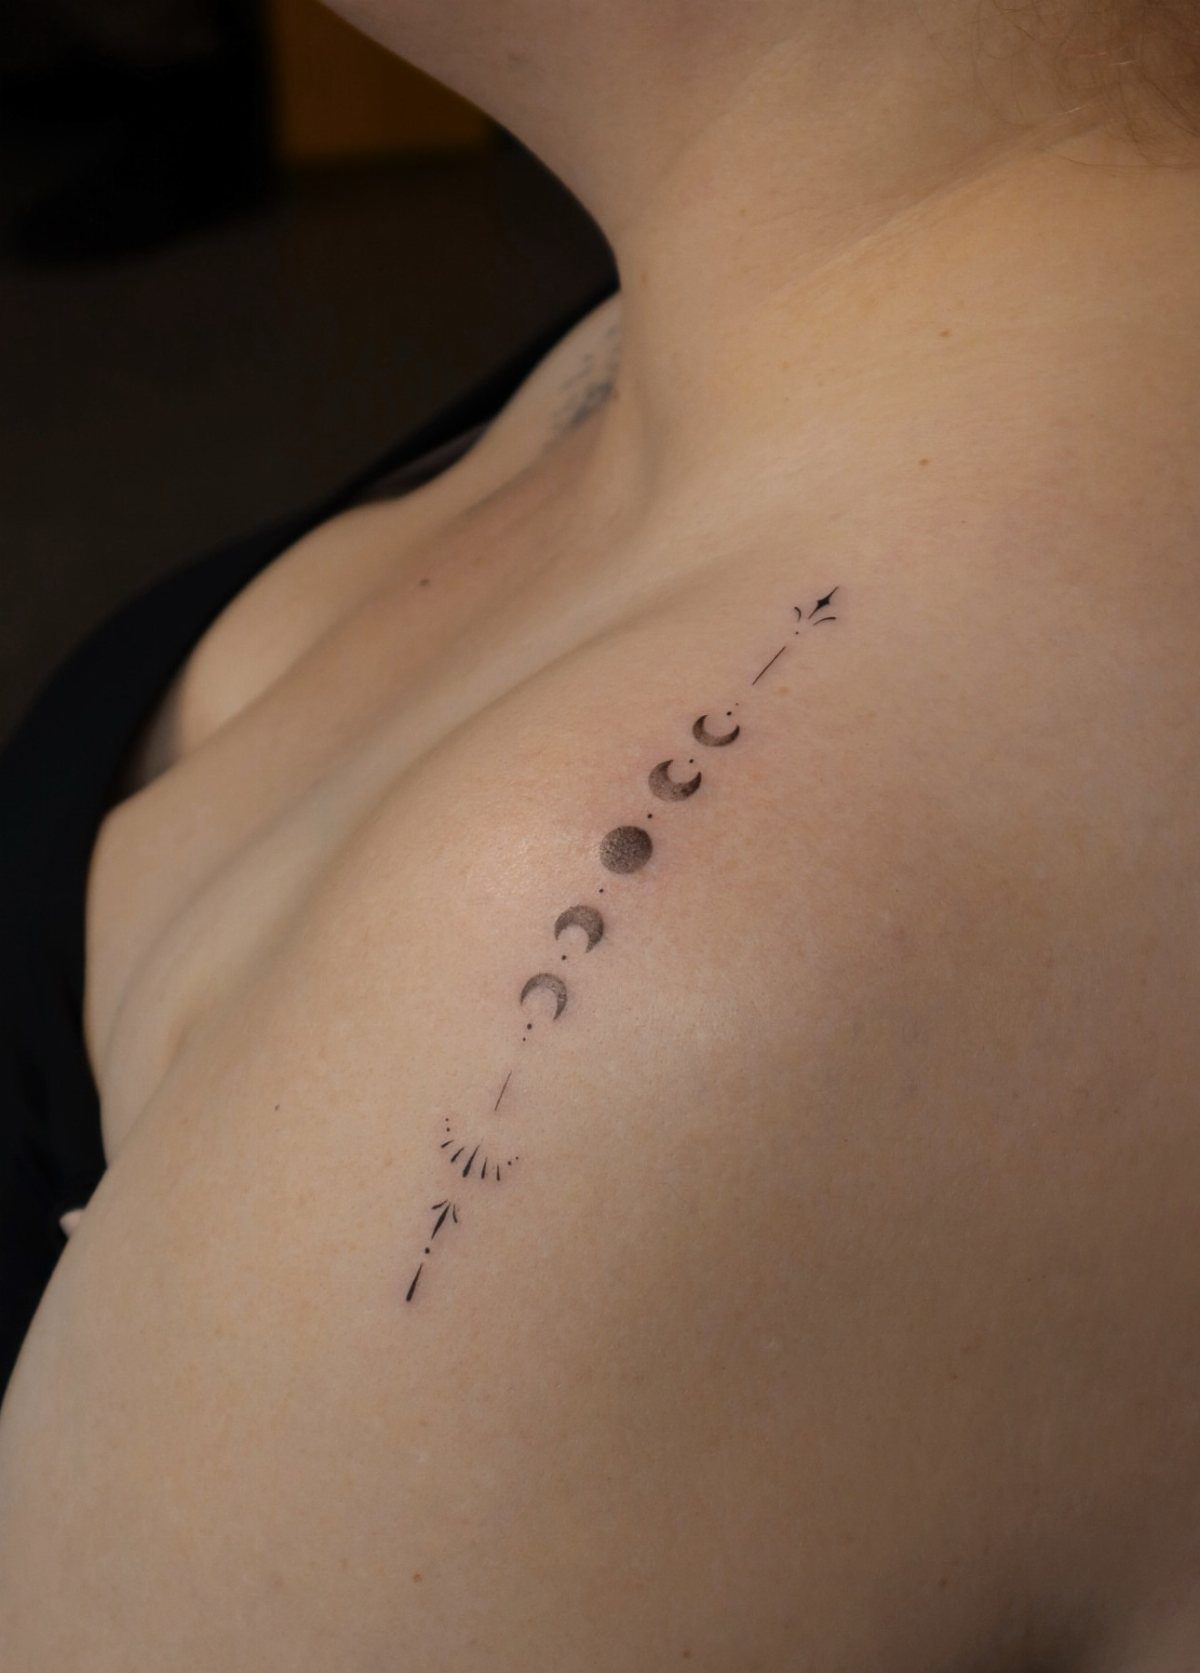
Arranging the phases vertically with arrows or geometric accents adds structure without extra bulk. The shoulder offers a flat surface that holds fine linework well, and the placement stays discreet under most necklines.
Minimal shading makes the piece feel light and shortens the session. Shoulder tattoos generally rank lower on the pain scale than ribs or spine, since there is more muscle between skin and bone.
If you want the tattoo visible in tanks but covered in T-shirts, positioning it closer to the collarbone gives you that control.
11. Moon Phases & Butterfly Arm Tattoo
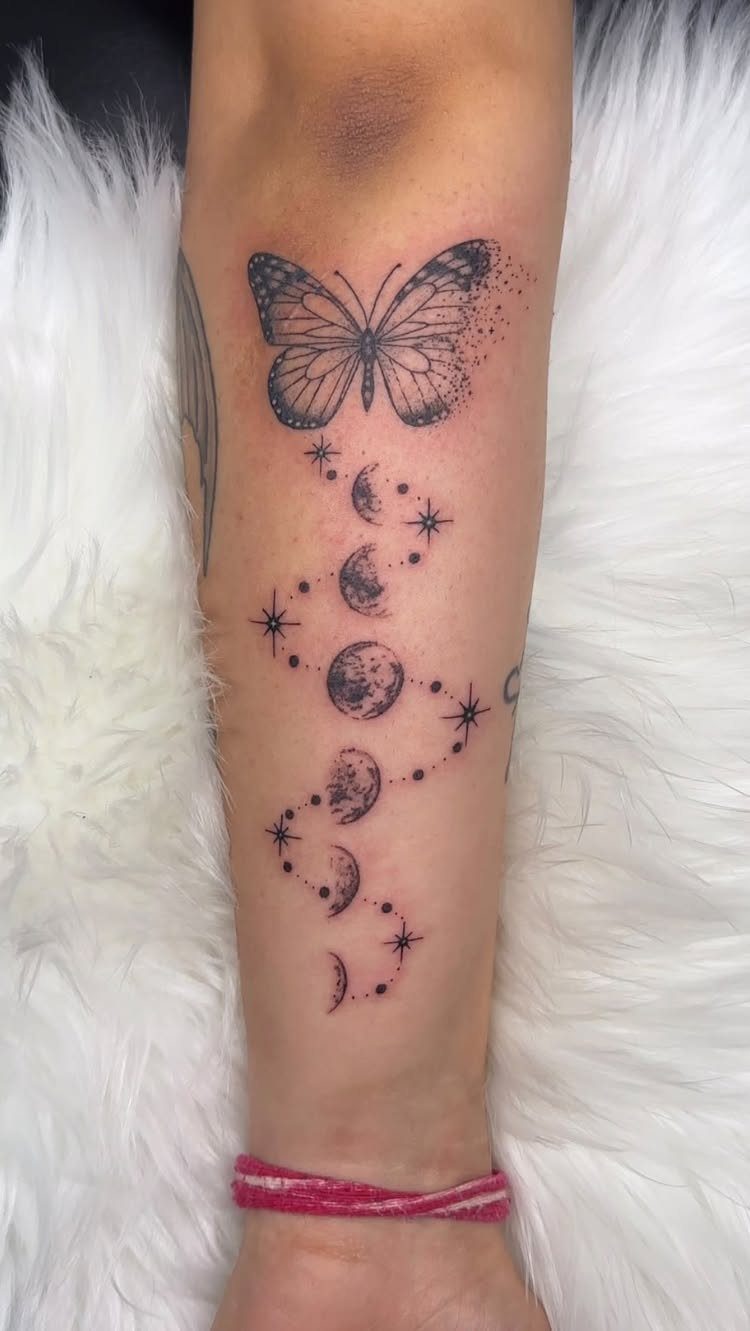
A butterfly above the moon phases shifts the design from purely celestial to something that bridges sky and earth. The combination works well on the forearm, where both elements stay visible and the vertical layout uses the arm’s length.
Adding stars between the phases fills space without crowding the composition. Black ink keeps everything cohesive, and the forearm heals relatively easily since it is not a high-friction area.
If you want a layered look, ask your artist to size the butterfly large enough that it anchors the top of the design rather than floating above it.
12. Bold Moon Phase Spine Tattoo
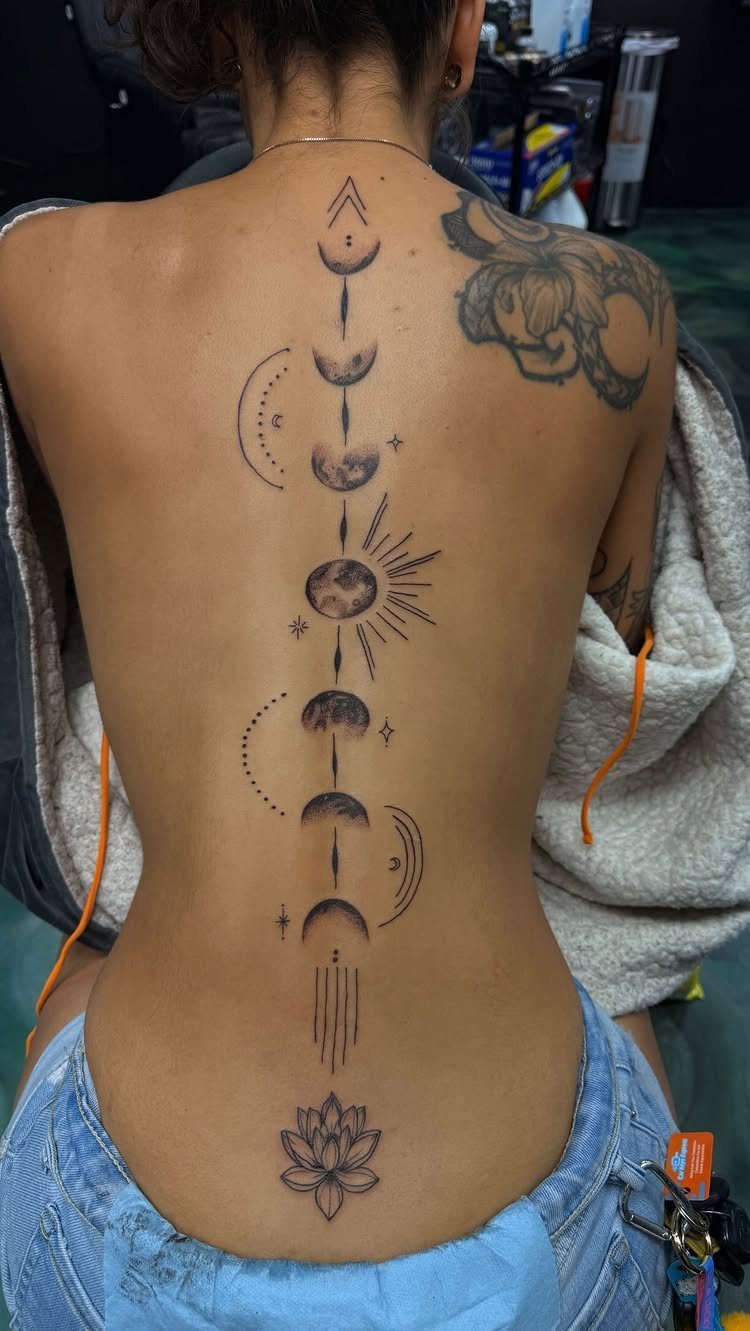
A lotus at the base of the phases adds a grounding element and ties the design to themes of growth or renewal. The spine’s length accommodates both the phases and the flower without cramping either.
Bolder linework makes the tattoo more visible from a distance and ages better than fine detail.
Spine placements hurt more than most spots, so if you are concerned about pain, starting with a smaller test piece on another area gives you a sense of how you handle it.
Lotus details take extra time, so expect a longer session than a simple phase-only design.
13. Matching Moon Phase Ankle Tattoos
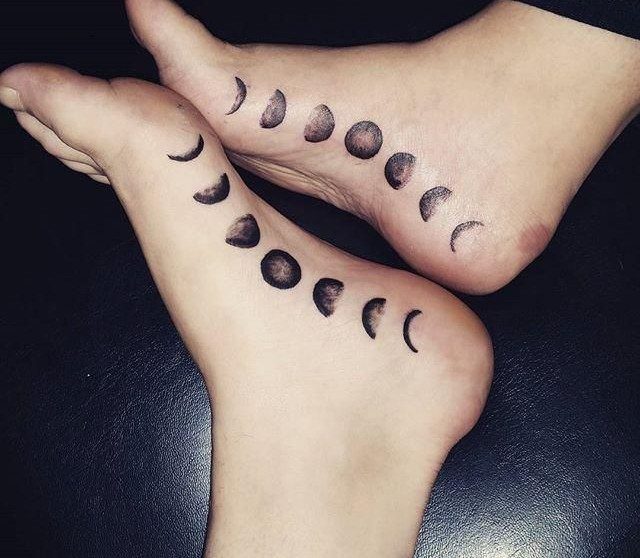
Matching tattoos on the ankles let two people carry the same design in a spot that stays mostly covered. The phases run along the side of the ankle, where the bone sits close to the surface.
Ankle tattoos rank higher for pain than fleshier areas, and the thin skin there means the needle feels sharper. Healing takes attention since shoes and socks rub the area constantly.
If you go this route, wear loose footwear for the first week and keep the tattoo dry until the skin seals.
14. Black & White Moon Phases with Sparkles Tattoo
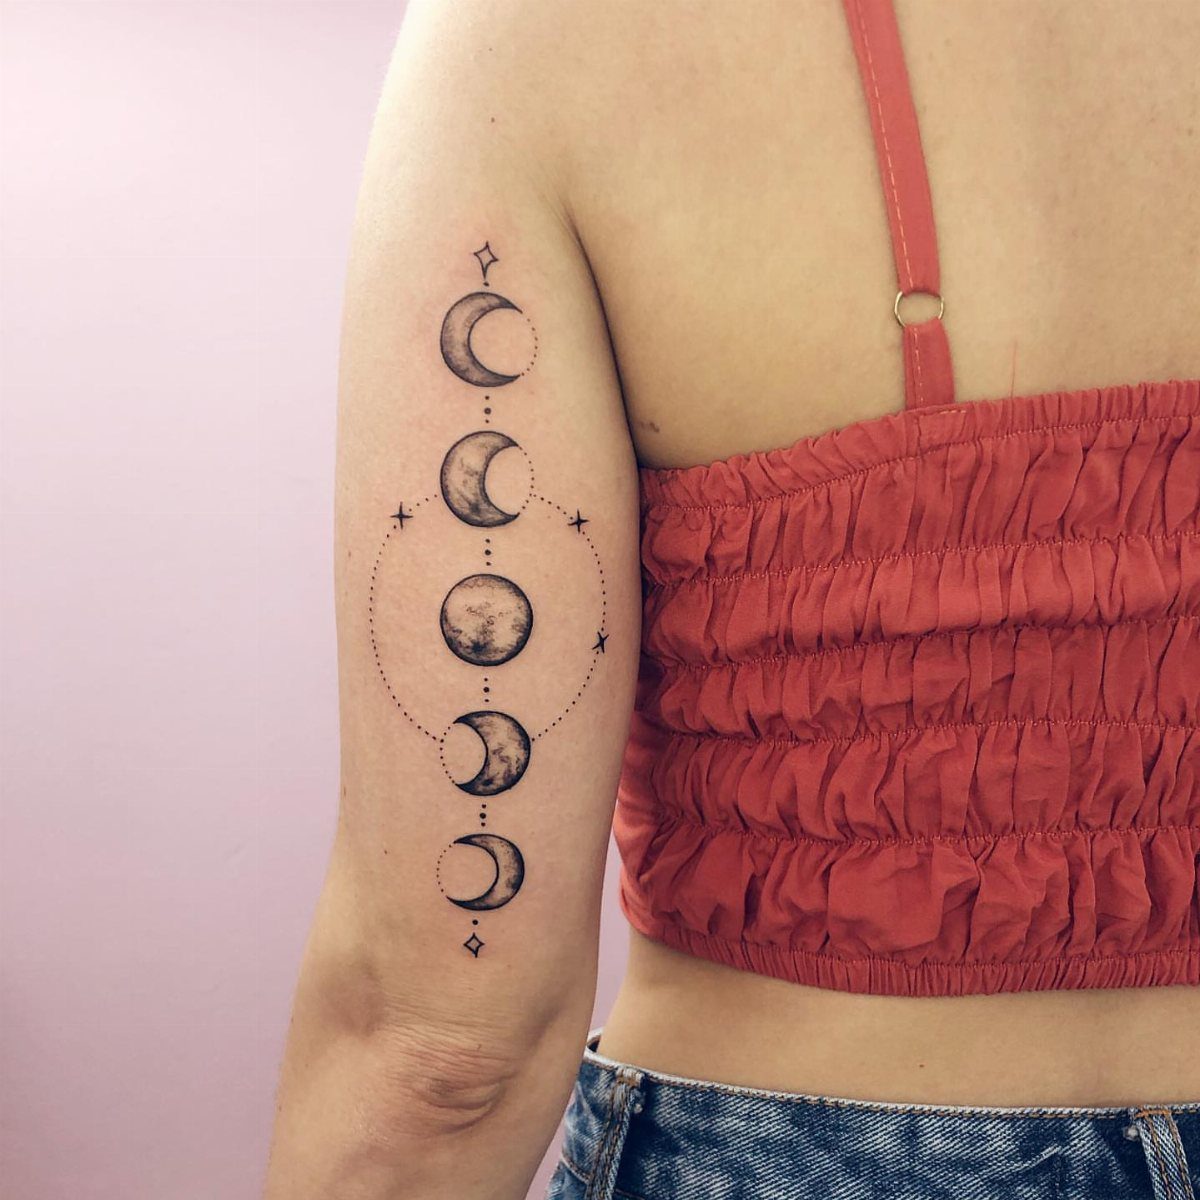
Stars scattered around the phases add a night-sky feel without changing the core design. The upper arm placement keeps the tattoo visible in short sleeves and offers enough surface area that small details hold up over time.
Black ink with fine dot work requires an artist who can keep the stars crisp and evenly sized. Too many stars can crowd the phases, so spacing matters more than quantity.
Upper arm tattoos generally hurt less than bony placements and heal without much friction from clothing.
15. Moon Phases Finger Tattoos
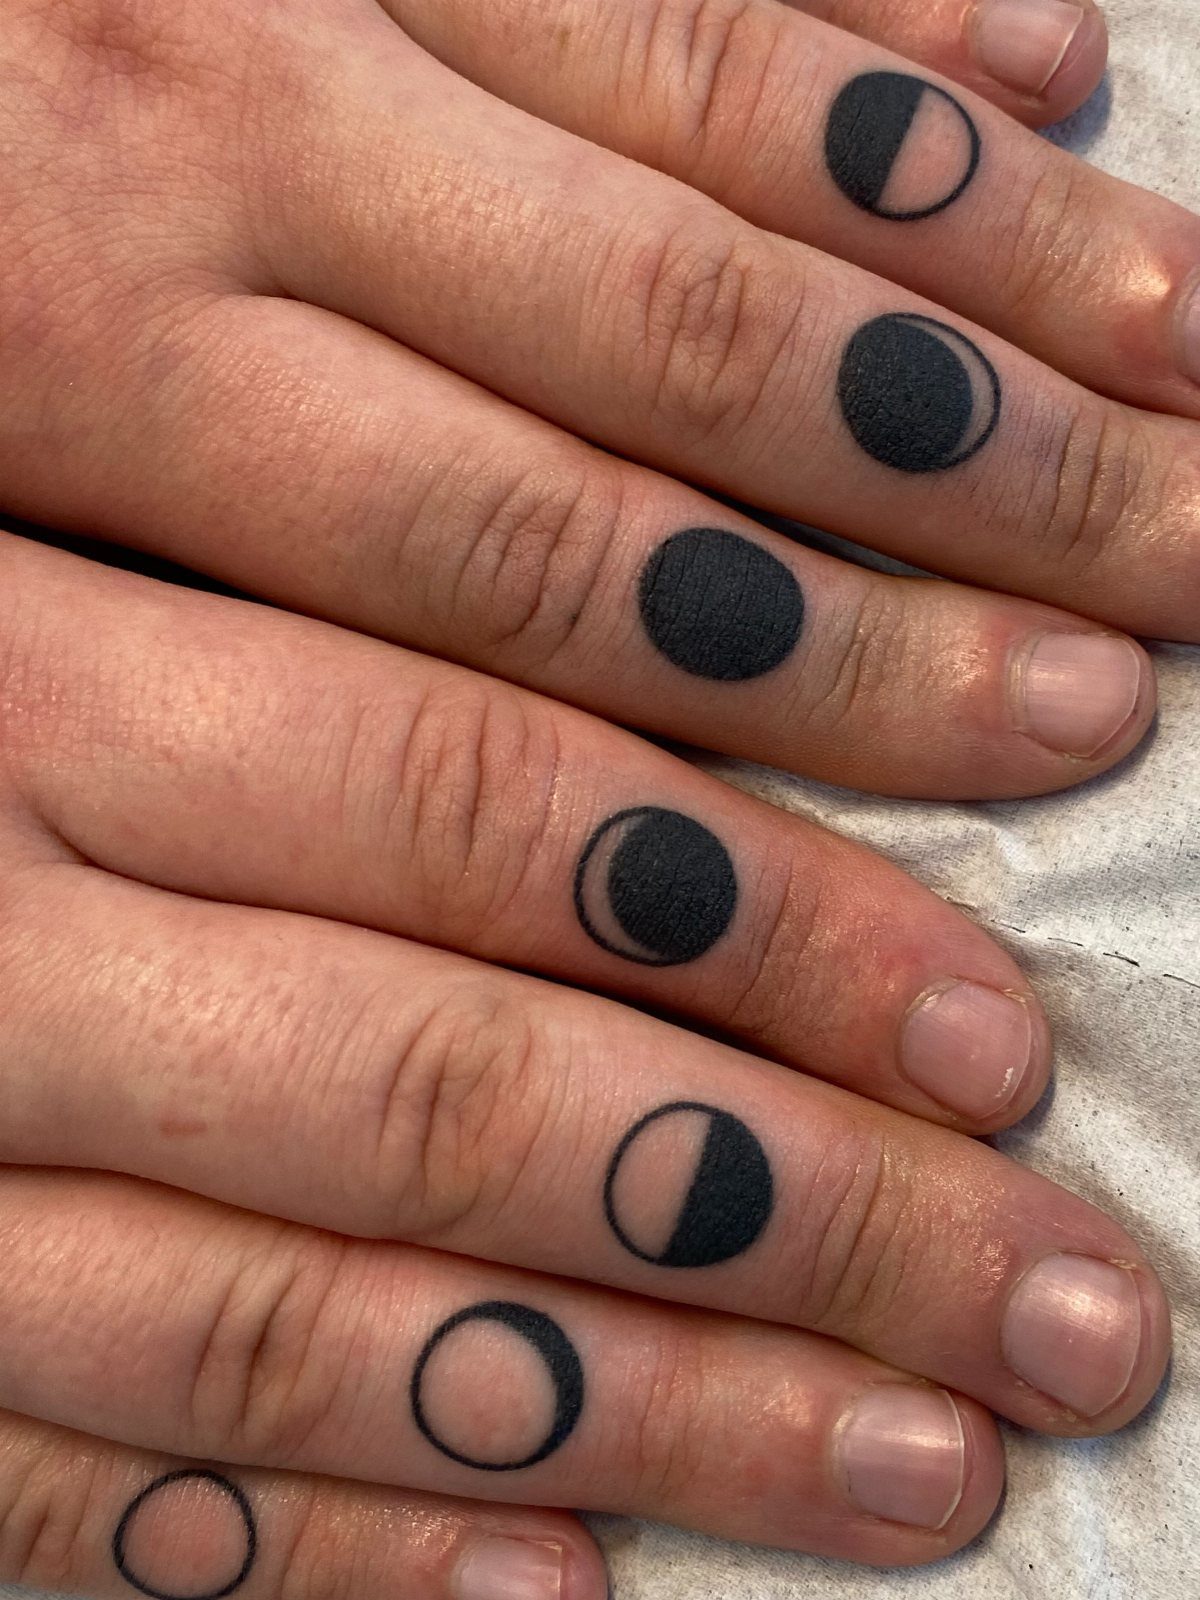
Spreading the phases across multiple fingers turns the design into something you see every time you use your hands. The cycle splits evenly between your left and right hand, one phase per knuckle.
Fingers fade faster than almost any other placement.
The skin sheds constantly, and daily use wears the ink down. Expect touchups every year or two if you want the lines to stay sharp.
Knuckle tattoos feel sharper than fleshier spots, and some artists avoid fingers entirely because of how poorly they hold ink.
16. Moon Phases & Branches Upper Arm Tattoo
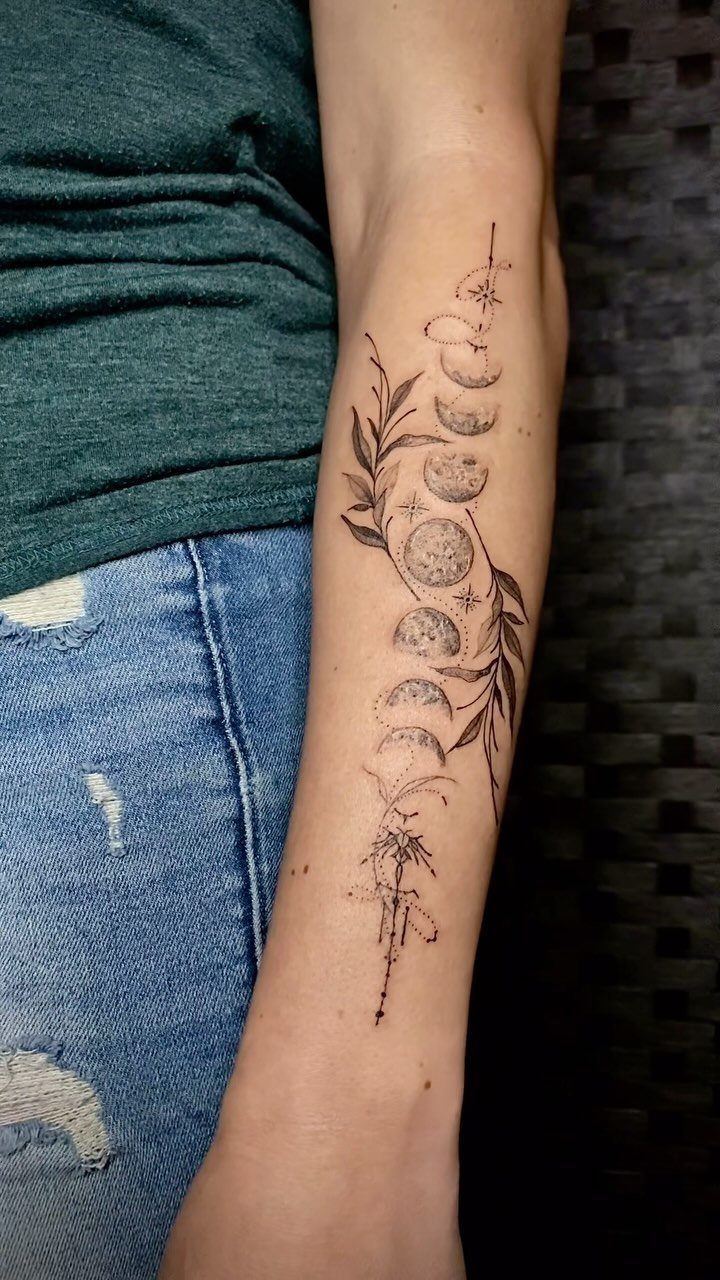
Branches weaving through the phases give the design an organic frame. The inner forearm works well for this layout since the flat surface lets both the phases and the botanicals sit cleanly without wrapping too far around the arm.
The stars fill negative space and bring scale without making the piece feel busy. Sticking to black gives you a unified look, and the inner forearm placement avoids most friction during healing.
When you need more coverage, extending the branch framework holds better than scattering extra stars.
17. Decorative Moon Phases Sternum Tattoo
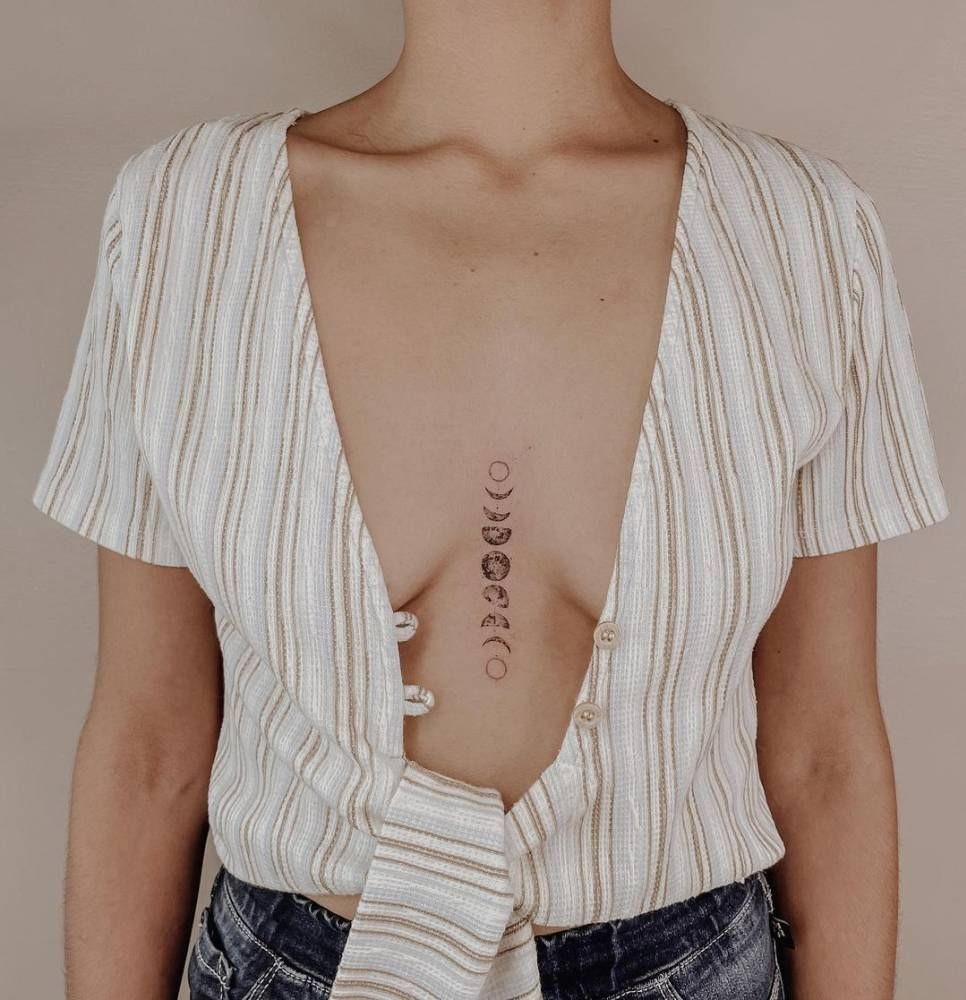
Placing the phases vertically on the sternum centers the design on the chest and keeps it symmetrical. Expect a sharper needle sensation here since skin sits directly on bone with minimal cushioning.
Clothing rarely covers this area unless you button up completely, so plan for it to show in most necklines. Aftercare is straightforward, but bras and tight shirts can rub the fresh tattoo, so loose clothing helps during the first week.
Detailed work here takes longer and costs more than simpler spine placements.
18. Centered Moon Phases Chest Tattoo
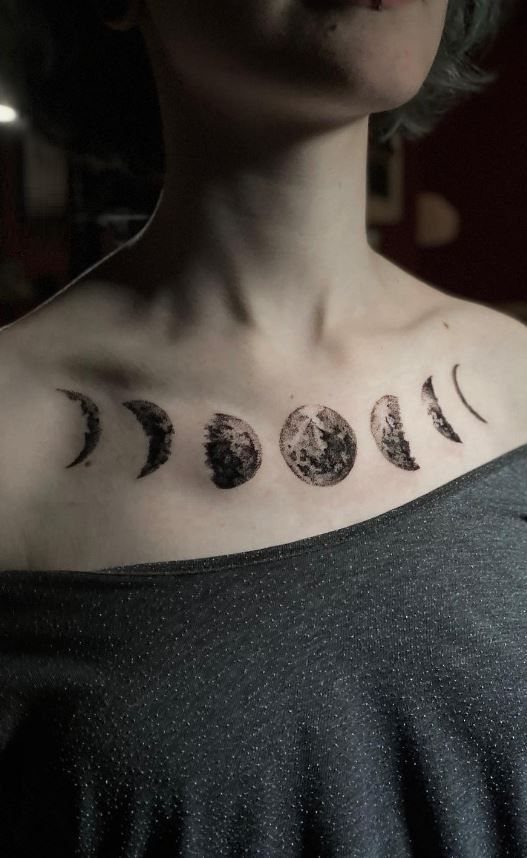
Centering the phases horizontally across the chest creates a balanced design that sits high enough to show in open necklines. The upper chest has more flesh than the sternum, so the session feels less intense.
This placement works well for anyone who wants a visible tattoo that still reads as intentional rather than accidental. A single-color design means less chair time and simpler maintenance down the road.
Chest tattoos heal without much interference from clothing, though tight collars can rub during the first few days.
19. Simple Moon Phases Wrist & Hand Tattoo
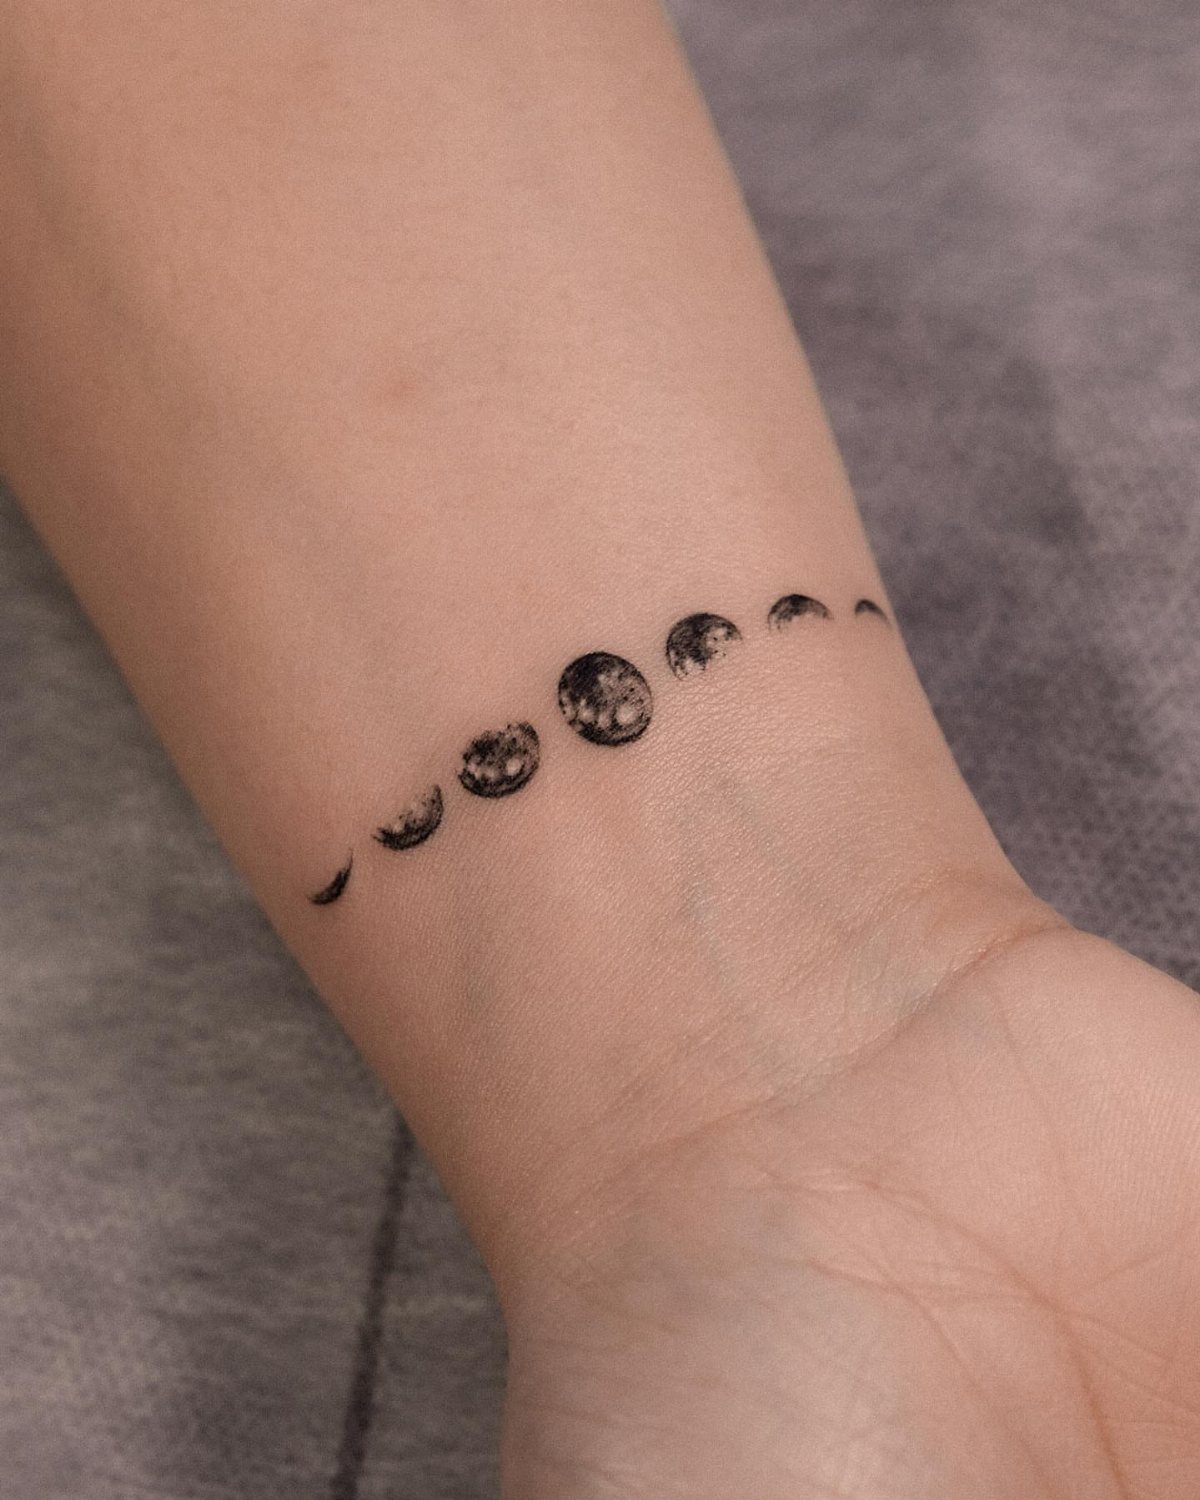
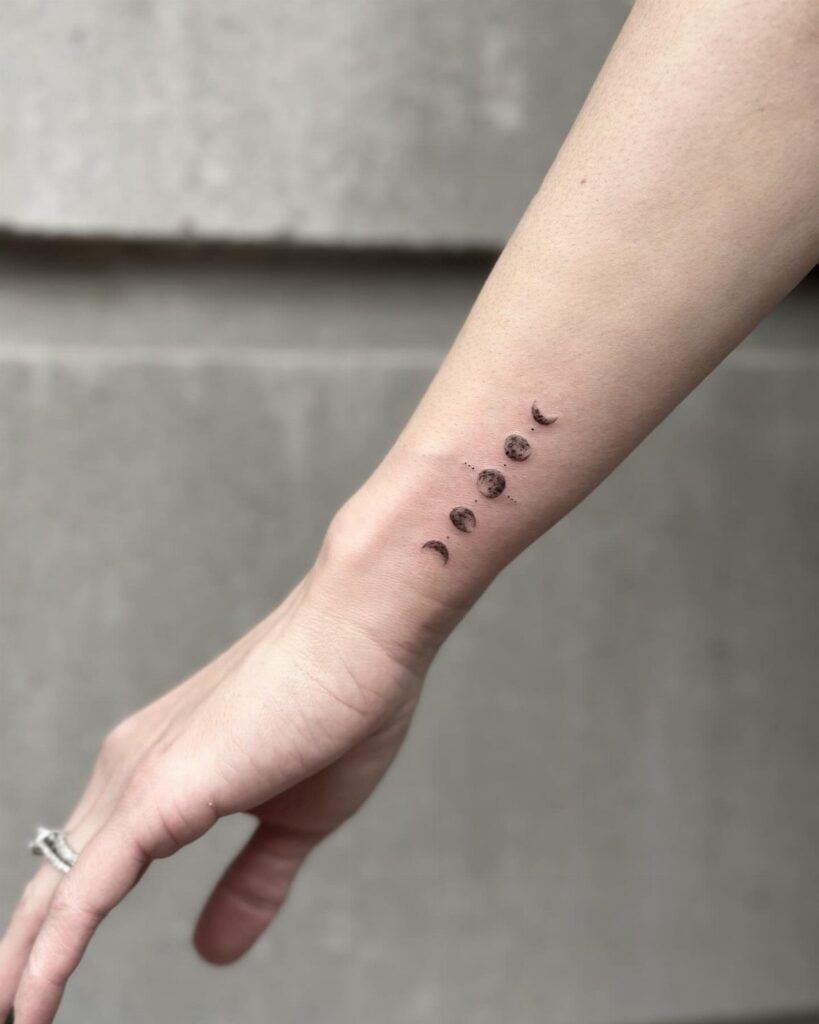
Curving the phases around the wrist keeps the design subtle but noticeable. The placement wraps slightly onto the hand, so part of it stays visible even when your arm is at your side.
Wrist tattoos fade faster than less-exposed areas since hands wash frequently and see constant sun. Touchups every couple of years keep the lines crisp.
Sessions for something this small stay quick.
20. Colorful Ink Upper Arm Moon Phase Tattoo
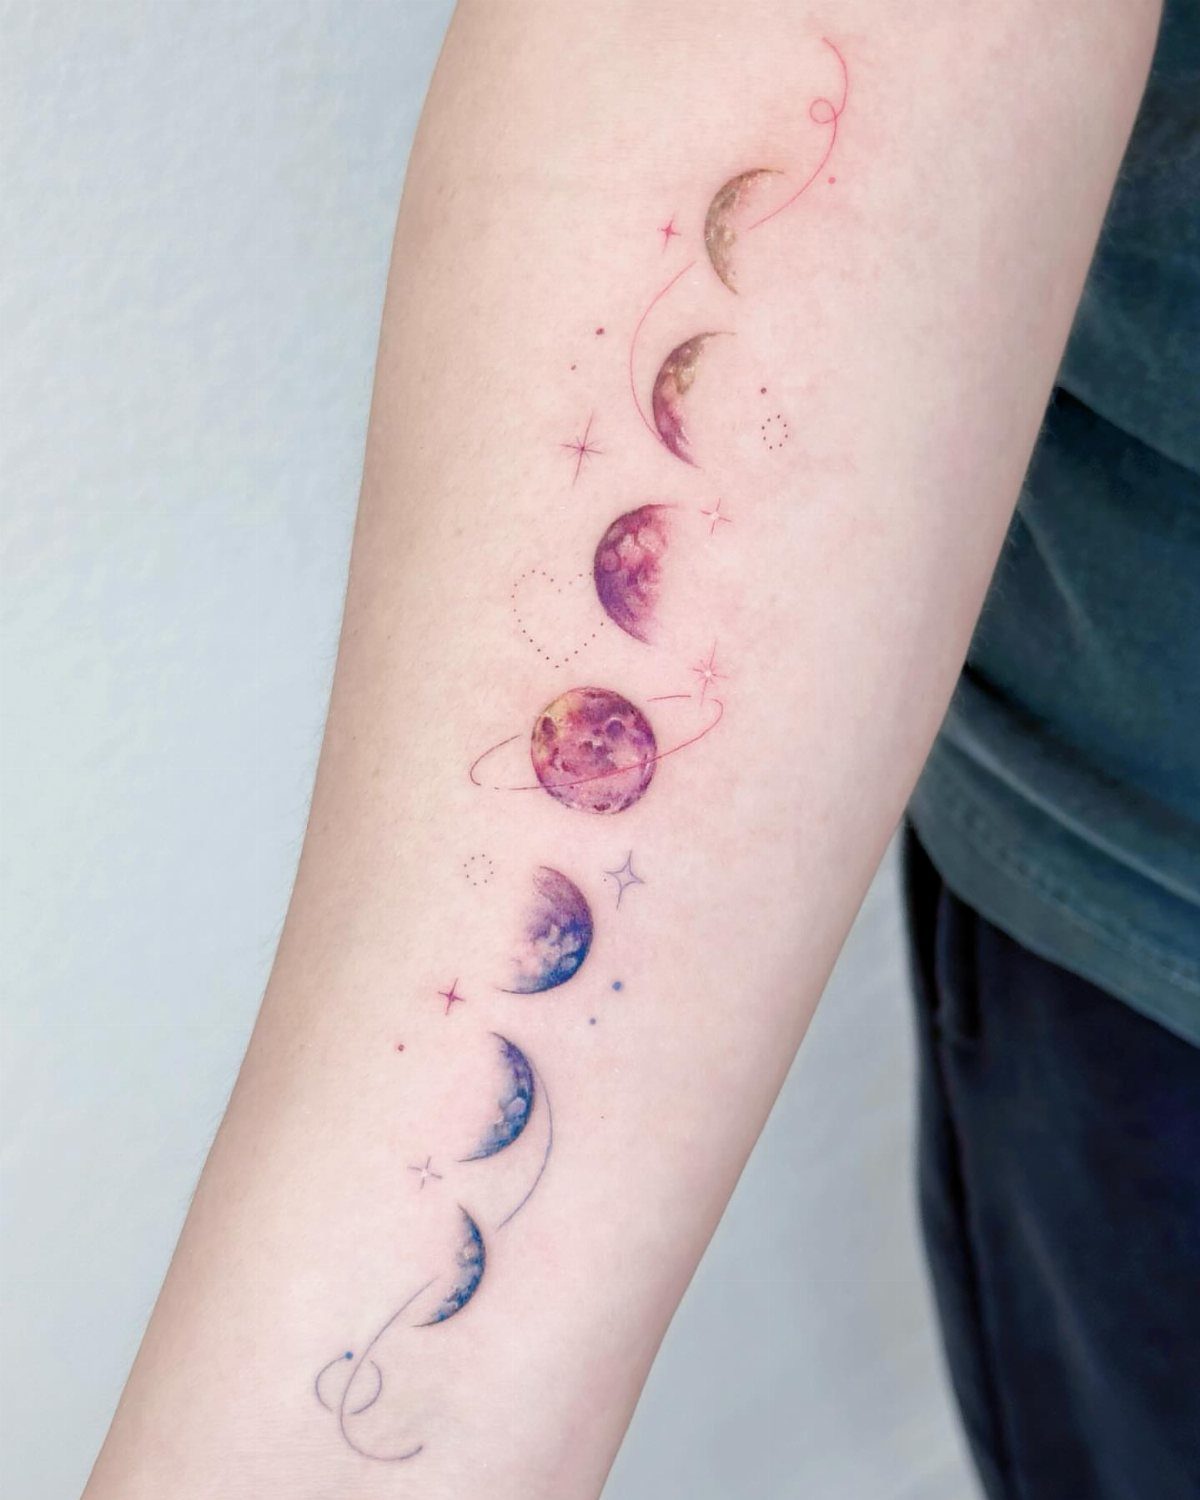
Adding color to the phases gives each moon its own tone and separates the design from standard black work. Purple, pink and blue ink create a gradient effect that reads as night sky without needing a background.
Color tattoos cost more and take longer than black ink alone, since each shade requires a separate pass. The upper arm holds color well and heals without much friction.
Stars and swirls between the phases fill the space and tie the elements together. Expect the brighter tones to soften over time, especially if the tattoo gets regular sun.
21. Realistic Forearm Moon Phases Tattoo
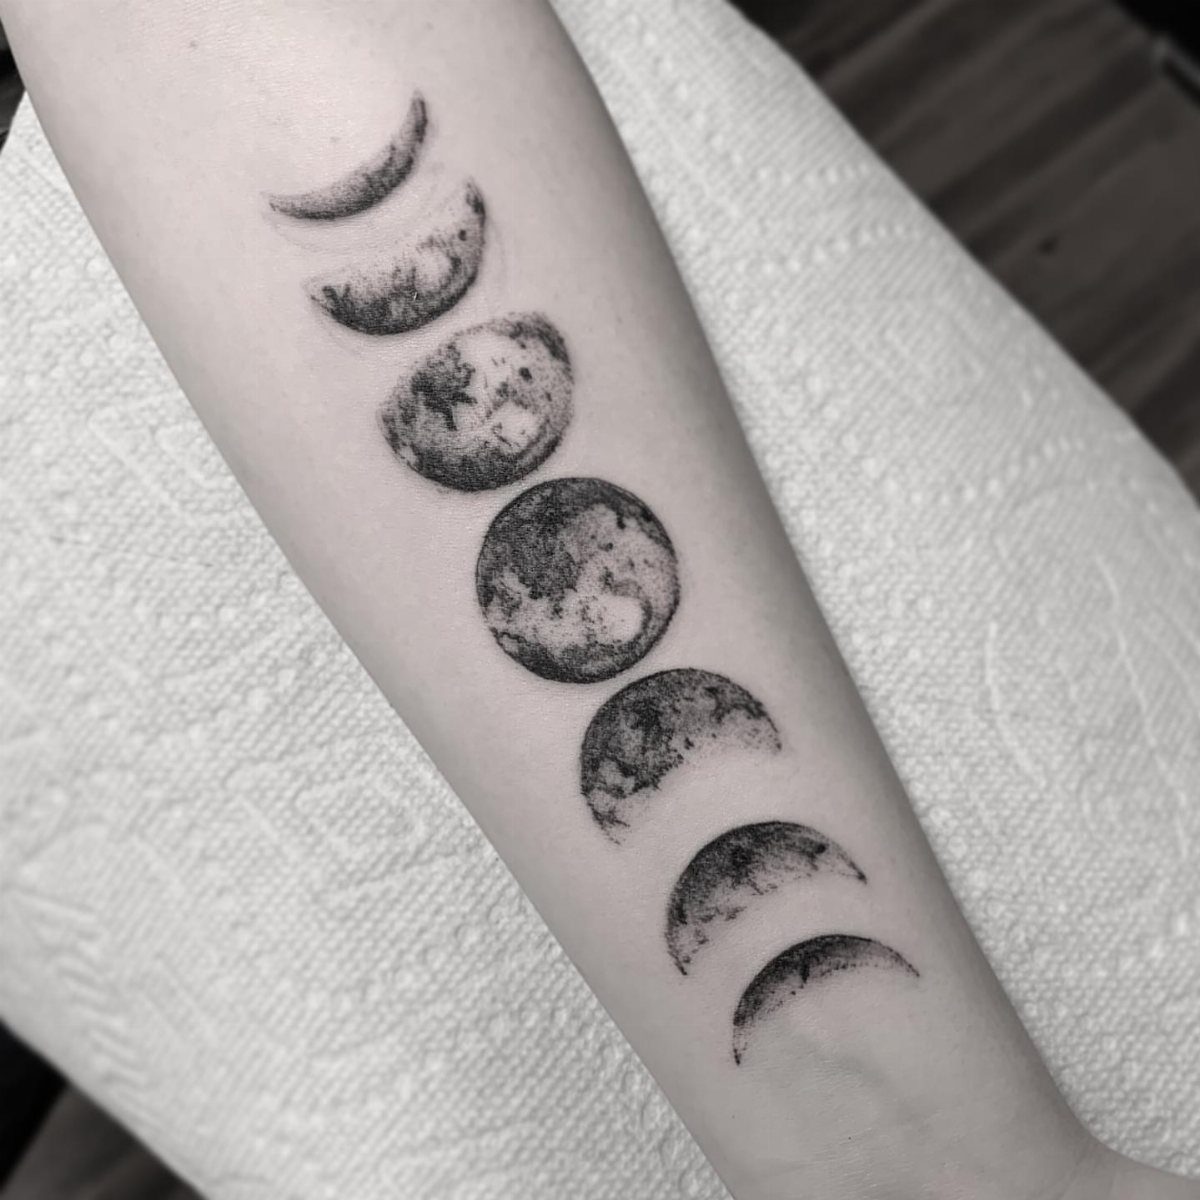
Realistic shading in each phase shows the craters and surface texture of the moon. The forearm gives enough length that all the phases sit vertically without crowding.
This style requires more time than flat black circles because of the detail involved. Shading also means more passes over the same area, which can feel more intense than single-pass linework.
Black and grey realism holds up well if the artist uses smooth gradients. The forearm is one of the easier spots to sit through and heals cleanly.
22. Geometric Moon Phases Design
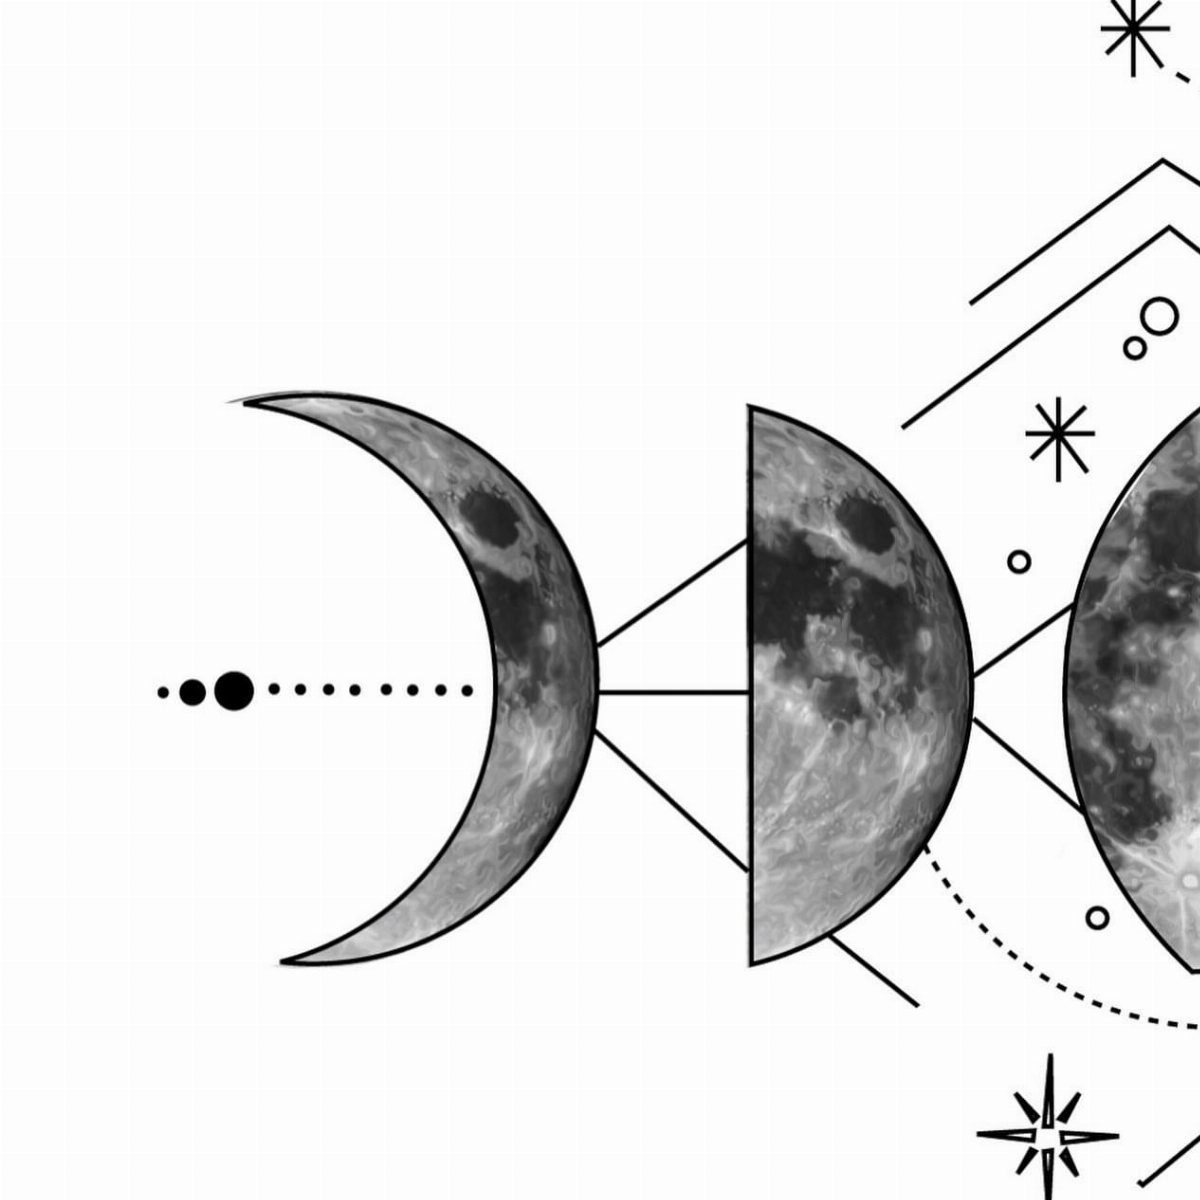
Geometric lines connecting the phases turn the design into a diagram rather than a straightforward illustration. The structure works well as a flash sheet or a reference for a custom piece.
Fine lines need precision, so check that your artist’s portfolio shows clean, straight work without wobbles. Stars at key points add balance without cluttering the layout.
This design translates well to the forearm or upper arm, where the vertical format fits naturally.
23. Vertical Moon Phases Flash Design
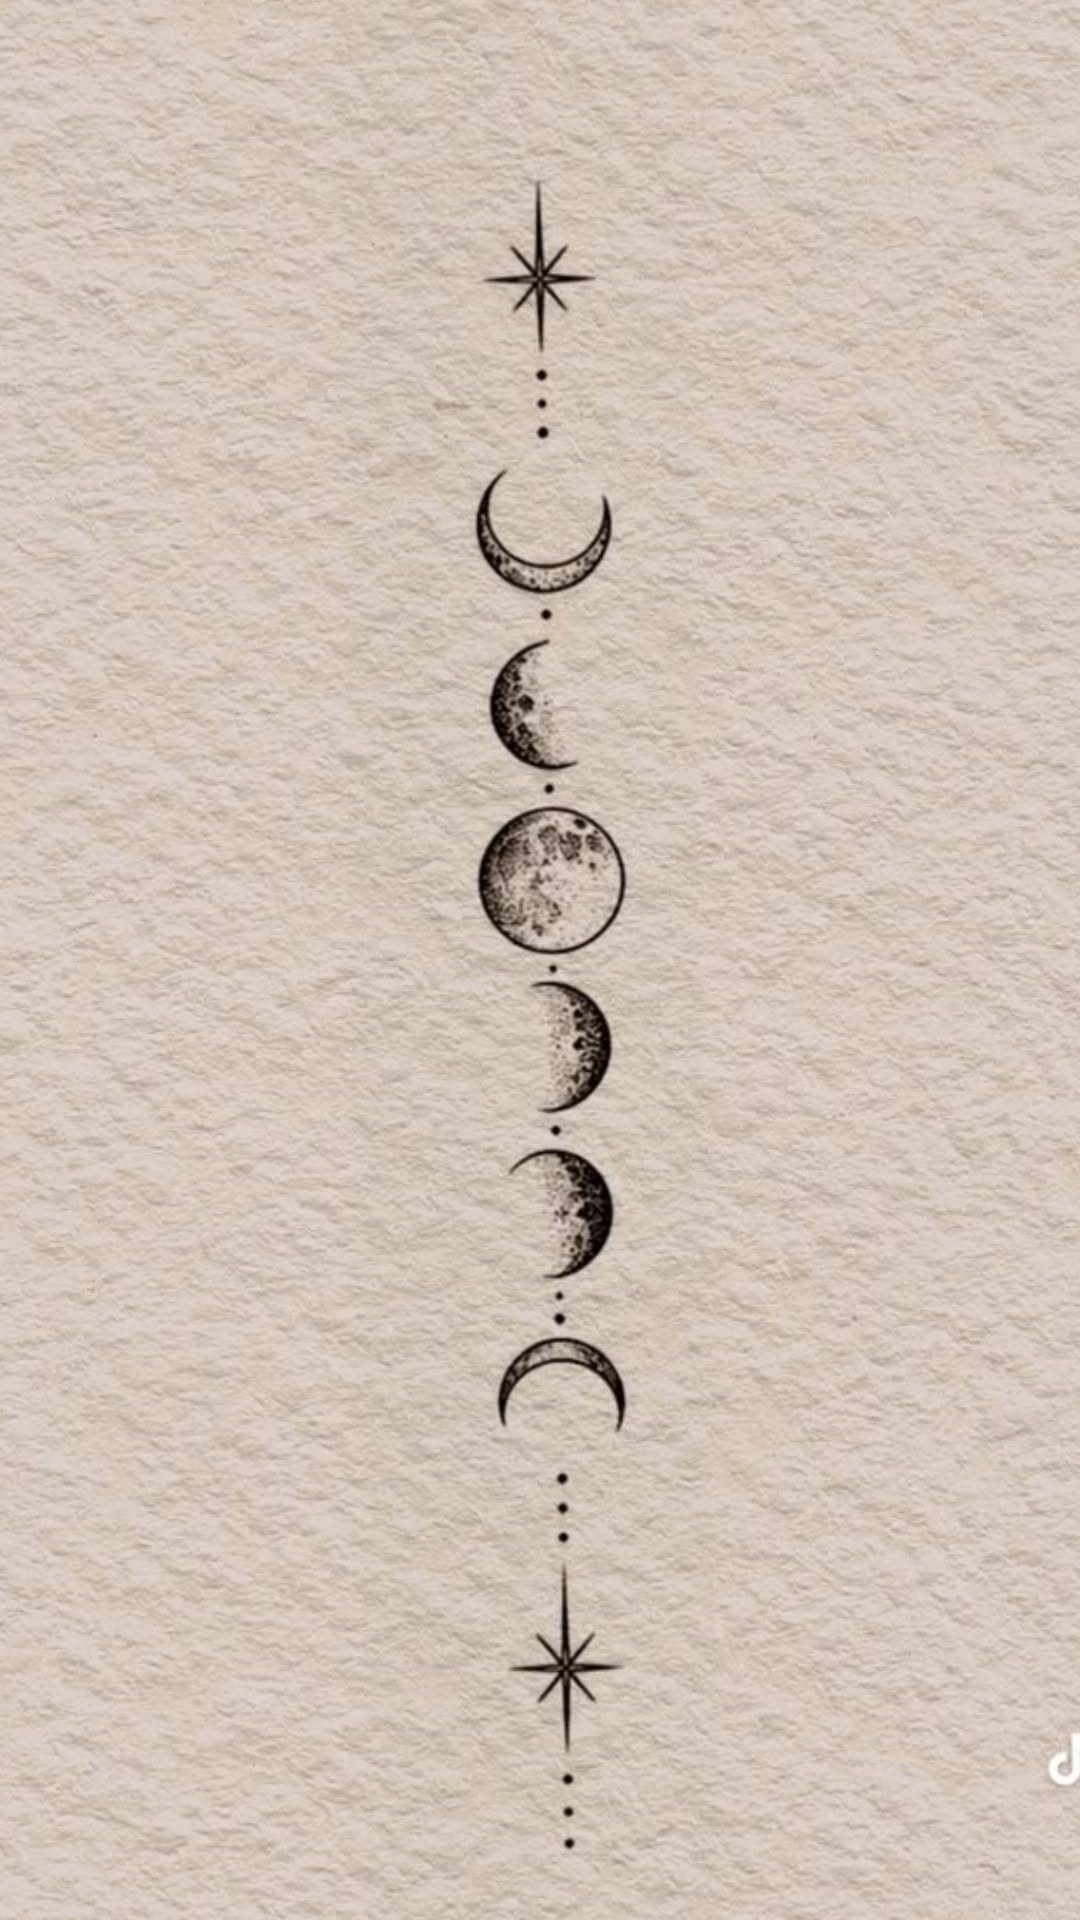
A vertical flash design with borders of dots and four-pointed stars frames the phases and gives the tattoo a finished edge.
Flash sheets like this one offer a ready-made layout that an artist can scale to fit your arm or leg.
The dots and stars add symmetry without requiring shading, so the session stays quick. Vertical placements work best on the forearm, shin or spine, where the length accommodates all the phases in a straight line.
Flash designs usually cost less than custom work since the layout is already drawn. The simple linework ages well and needs fewer touchups.
24. Linear Forearm Moon Phases Tattoo
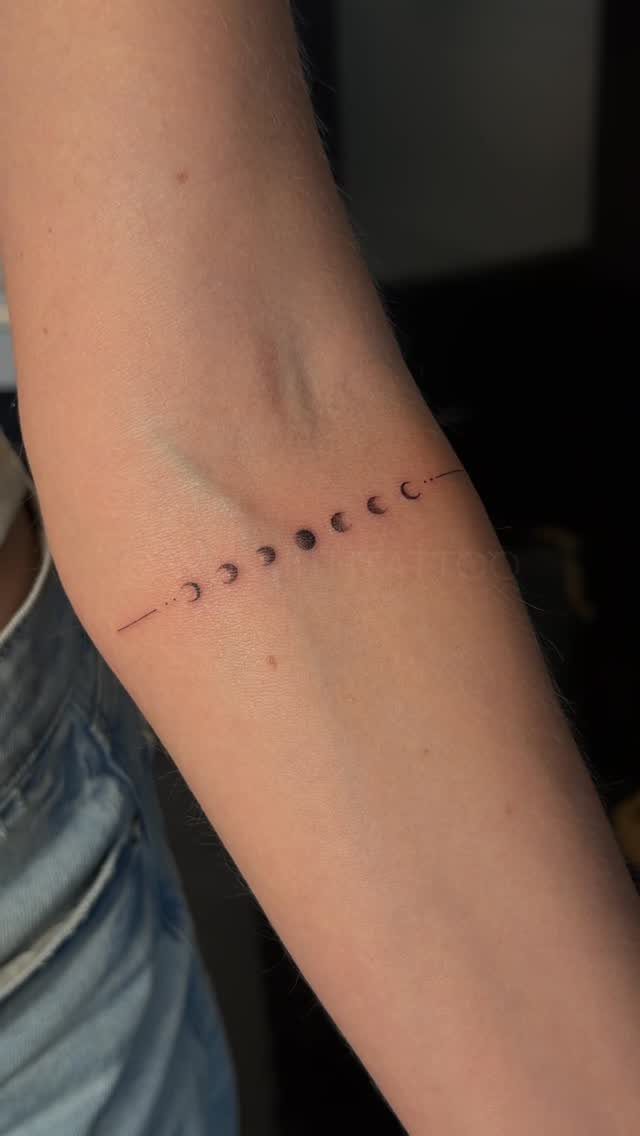
A straight line of phases down the forearm reads cleanly and stays visible in short sleeves.
Minimal embellishment means the tattoo finishes quickly, often under an hour. The forearm ranks lower for pain than bony areas like the wrist or ribs, and healing is straightforward since clothing rarely rubs the spot.
If you want the phases to align perfectly, ask your artist to measure the spacing before starting. Even gaps make the design feel intentional rather than rushed.
25. Filigree Moon Phases Back Tattoo
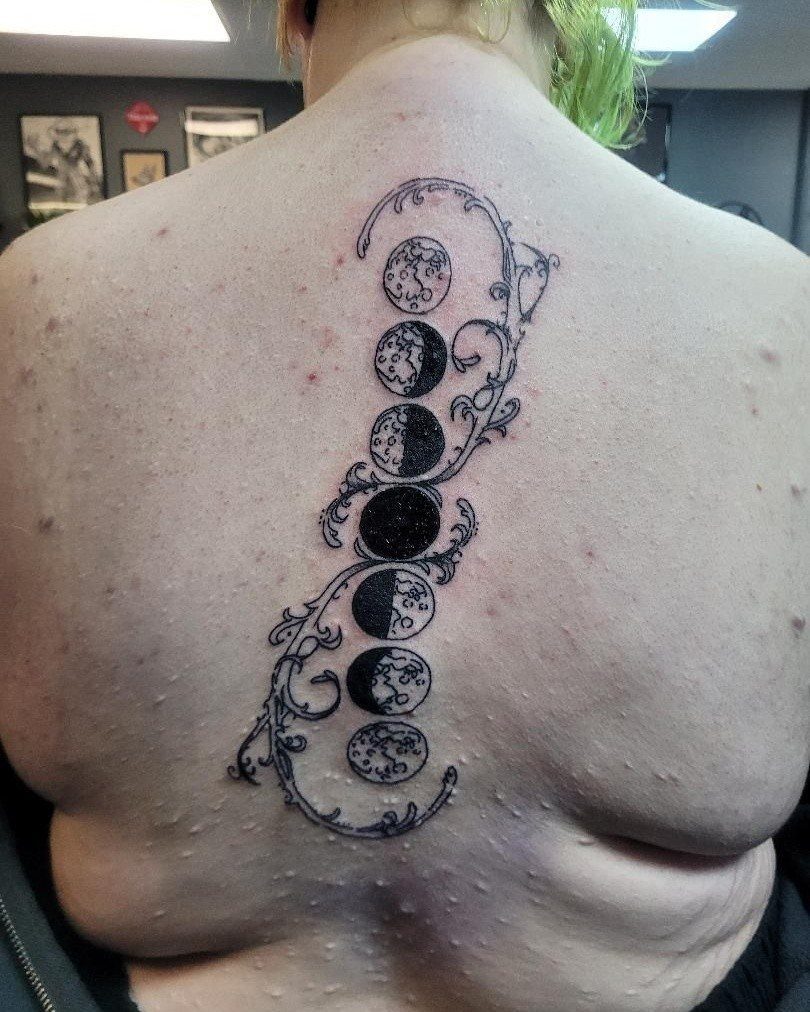
Decorative swirls around the phases soften the geometry and give the design a vintage feel. The upper back offers a wide, flat canvas that holds fine detail well and hurts less than the spine or shoulder blade.
Filigree takes extra time since each curve needs to flow smoothly, but the added ornament makes the tattoo feel more finished than phases alone. The upper back stays mostly covered, so you control when it shows.
Black ink keeps the swirls crisp, and the area heals without friction from waistbands or straps.
26. Horizontal Upper Back Moon Phases Tattoo
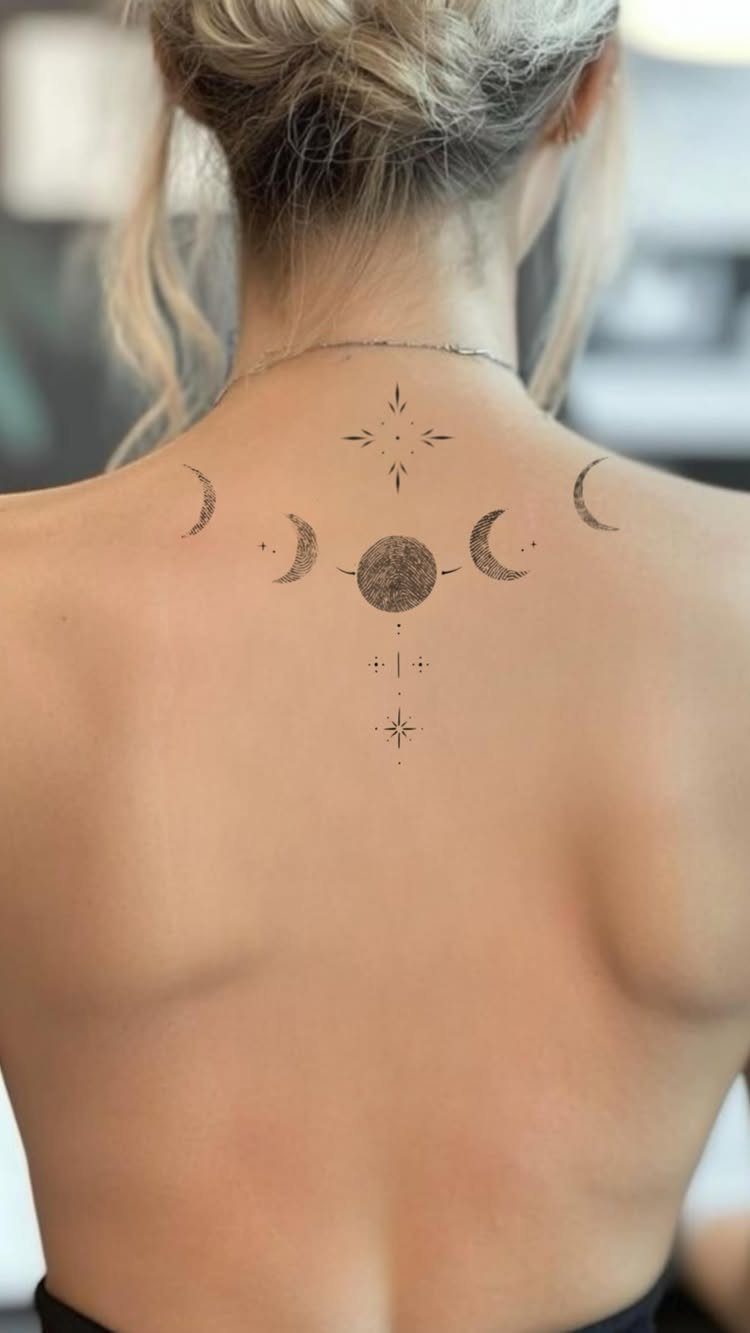
Running the phases horizontally across the upper back uses the width of the shoulders rather than the length of the spine.
The upper back sits far enough from bones that the session stays manageable, and the placement works well if you want the tattoo visible in backless tops but hidden otherwise.
Horizontal layouts feel more grounded than vertical ones, and the symmetry holds even if you gain or lose weight later.
27. Botanical Moon Phases Forearm Tattoo
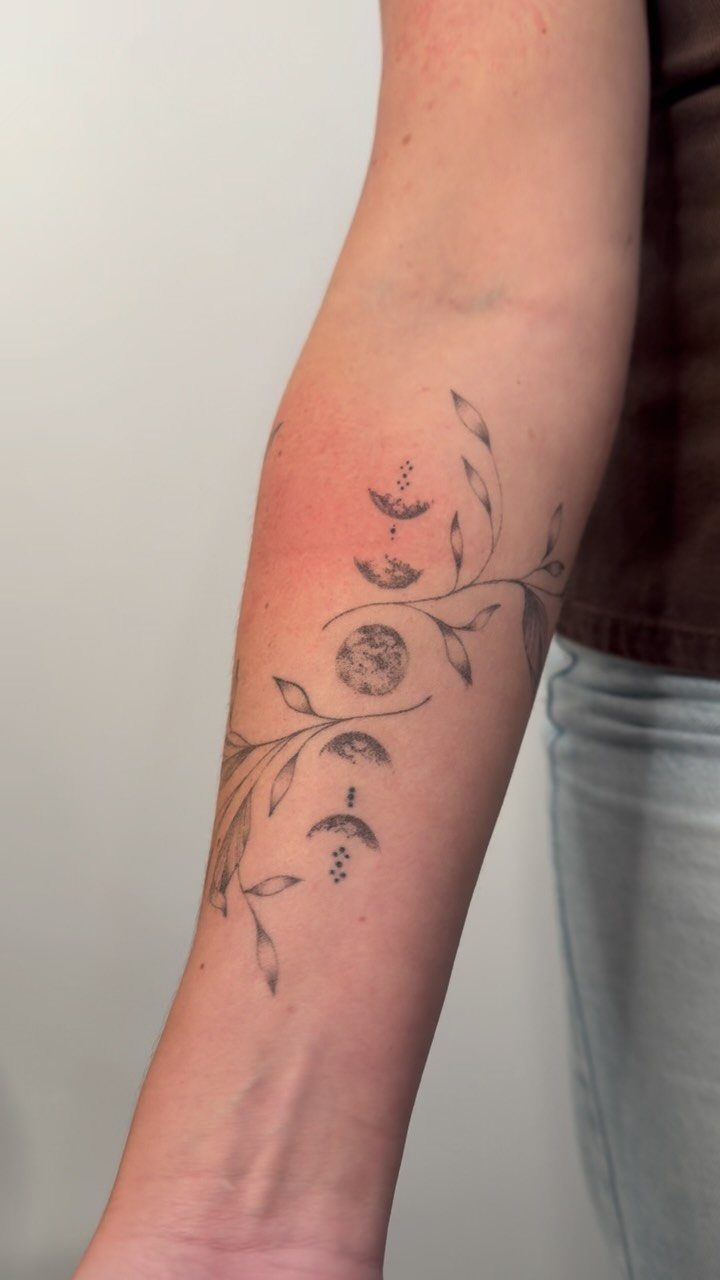
Branches wrapping through the phases bring the design into a natural rather than purely astronomical space. The forearm’s length holds the full cycle without crowding, and the visibility makes it one of the more interactive placements.
Leaves add detail but also time, so expect a longer session than phases alone. The forearm sits comfortably in the low-pain zone and stays clear of waistbands and seams that irritate fresh ink.
Overlapping phases and stems instead of keeping them separate gives the piece a woven look rather than phases sitting on top of decoration.
28. Vertical Calf Moon Phases Tattoo
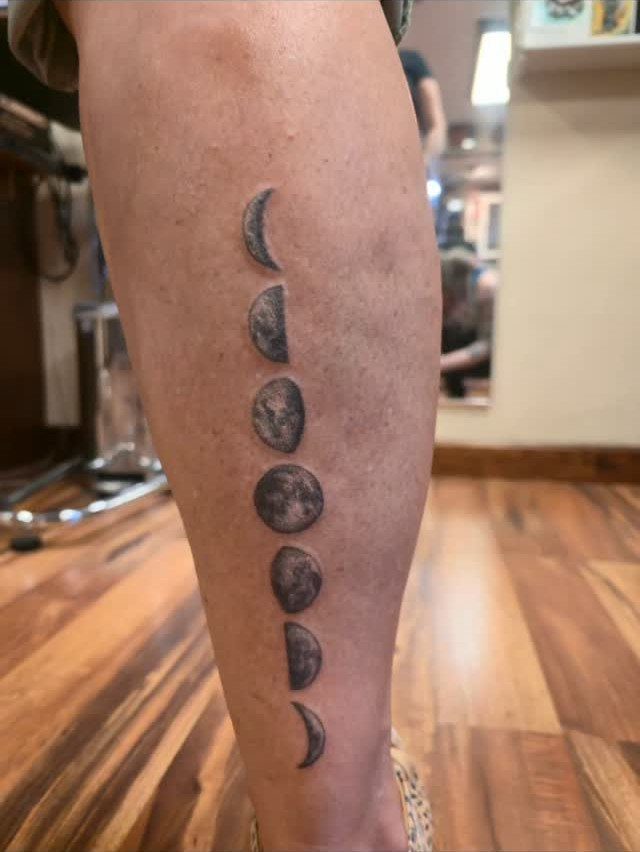
The lower leg offers enough length that the phases stack vertically without needing to curve. Black and grey shading gives each phase dimension and keeps the design from reading as flat circles.
Calf tattoos hurt less than ankles or shins since there is more muscle padding, but the lower leg still sits close to bone in some spots. Healing is straightforward, though tight boots can rub during the first week.
This placement stays covered in pants and visible in shorts, so you get flexibility in how often it shows.
29. Floral Wreath Moon Phases Shoulder Tattoo
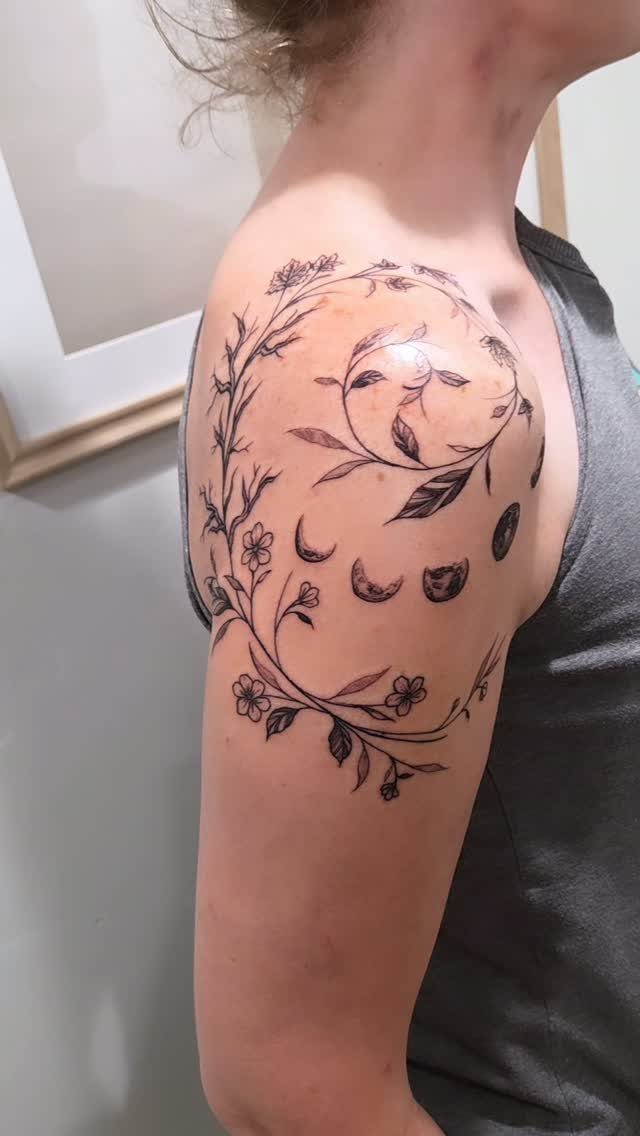
Enclosing the phases in a floral wreath turns the cycle into a focal point rather than a linear sequence.
The shoulder offers a rounded surface that suits circular designs, and the placement stays visible in tank tops but covered in sleeves.
The creator of this piece describes it as a Fibonacci spiral with all 4 seasons and the phases of the moon, so the wreath can carry seasonal flowers if you want that layered symbolism.
Circular designs take longer than vertical layouts since the artist has to balance the composition from all angles.
Shoulders heal easily and hurt less than bonier spots.
Symbolism of Moon Phase Tattoos
The full cycle represents change that repeats rather than ending. A new moon marks the start, the full moon sits at the peak, and the waning phases close the loop before it begins again.
Transformation shows up in the shift from one phase to the next.
Growth moves in both directions: waxing moons build toward fullness, waning moons release back toward darkness. Both halves carry meaning.
The rhythm ties to anything that moves in cycles.
Some people connect it to personal growth, others to natural patterns like tides or seasons. The design works without needing to explain which cycle you had in mind.
Placing a central full moon between the waxing and waning sides balances the composition and gives the brightest phase more weight.
Placement Ideas for Moon Phase Tattoos
The arm offers the most surface area and the clearest sightline. Inner forearm placements face you, outer arm and tricep placements face others.
Spine placements run vertically and stay centered, which works well for narrow designs.
Fingers stay visible constantly but need frequent touchups.
Sternum and chest placements center the design and stay covered under most shirts.
Styles of Moon Phase Tattoos
The phases sit in a line, and the lack of detail keeps the session short. Fine linework shows any wobble, so the style depends on steady hands.
Bold work uses thicker outlines and more contrast.
The phases read from farther away and hold up better as the ink ages. Adding geometric shapes or solid black elements gives the design more structure.
Each phase needs gradients to build dimension, so the session takes longer and requires more passes.
Frequently Asked Questions
What do star and moon tattoos mean?
Stars paired with moon phases add a night-sky theme and symbolize cosmic connection. The combination keeps the design celestial without needing a full background, and the stars fill gaps between the phases naturally.
Where should I put my moon tattoo?
The spine, forearm and wrist are the most common placements for moon phase tattoos.
Vertical placements like the spine follow the body’s natural line, while the forearm and wrist keep the design visible and easier to show or cover depending on clothing.